
How to Make Transparent Background in Photoshop?

Do you wish to transform your solid-color or opaque background photographs into transparent ones without losing quality in Adobe Photoshop? Keep reading to discover how to use the software to accomplish this task.
Transforming a solid-color or opaque background image into a transparent one can be challenging even with the best photo editing software, Photoshop when you don’t know how to use the toolkit. However, in this article, you will learn how to make a transparent Background in Photoshop freely and quickly. Without wasting your time, let’s begin.
Table of Contents
Stepwise Guide to Make Transparent Background in Photoshop
Well, I believe you have installed a compatible version of Adobe Photoshop on your PC. And if you haven’t, you can click the link to get yours. Follow the stepwise guide below to make transparent backgrounds in Photoshop:
Open your preferred image
Firstly, you must add an image with a solid color or opaque background to Photoshop. To do this, click the File option at the top left corner of your screen to access a drop-down menu. Scroll down the menu and then tap on Open to navigate your way to your PC file manager, where your images are saved. Select a file and then click on Open. Alternatively, you can use the short key Ctrl + O Read full tutorial – How to open a file in photoshop.
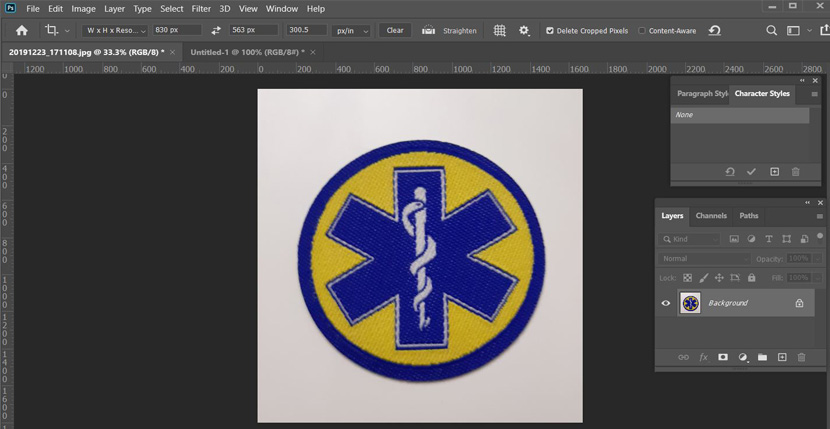
Open an Image
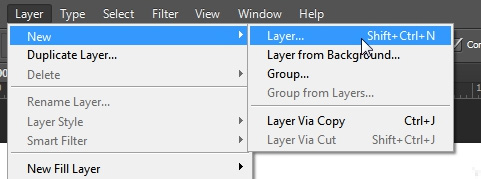
Create a New Layer
Next, locate and tap on the Layer icon. A drop-down menu will pop up. Select New from the list of options that shows underneath. Another drop-down will appear. Tap on the Layer option. Alternatively, you could use the hotkeys Shift + Ctrl + N. A visual representation of this is given below.
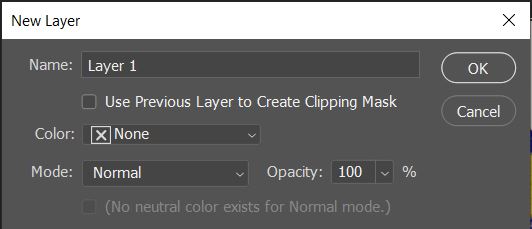
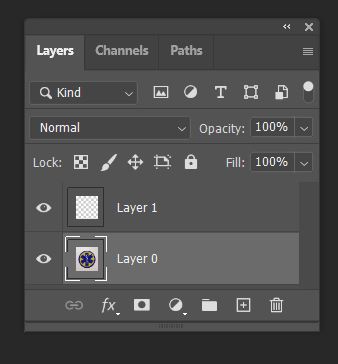
Then, a new layer box will pop up. Leave this as the default name, Layer 1, and then hit the OK button.
After that, you can see a transparent background layer ( Layer 1) on the Layer panel at the top of the background layer. But if you don’t see the layer panel, you can see it by clicking on Window > Layers from the dropdown menu at the top of the application window OR pressing F7 from your keyboard.
Note: Layer 1 must be used for a white background or any other color background. So ignore it if you need only a transparent image on the final background.

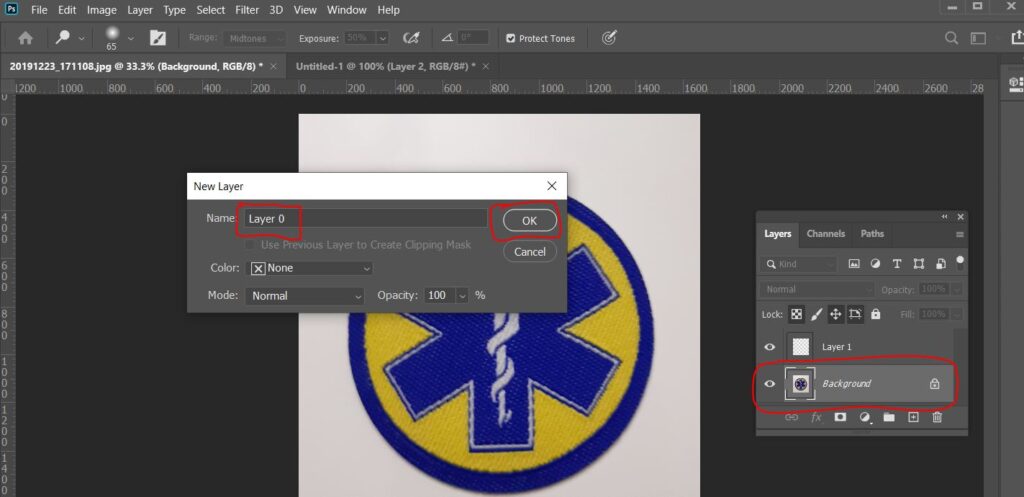
After completing the instructions above, go to the Layers panel located in the lower right corner of your Photoshop interface. Double-click on the Background layer, and a new layer requesting you to rename it will pop up. Leave this as the default name, Layer 0, and click the OK button.
Now that you have unlocked a background layer ( layer 0), Delete anything from it, and it will become transparent.
Trace the Object or Subject of the Image
After creating background layer 0, you should trace the object or subject of the picture. To do this, select the Magic Wand tool from the tool palette on the left-hand side of the program.
Now that you have the Magic Wand tool use it to trace an item on the image. Before tracing, you could ask Photoshop AI to assist you with this task by clicking on the Select Subject icon from the options bar at the top of the software window. Immediately, the software will start selecting the object or subject of the photograph, leaving the background.
Note: Select the Background Layer 0 before pressing the Select Subject button.

Delete Background
Once the object or subject is traced, use the hotkeys Shift + Ctrl + I (Windows) or Shift + Command + I (Mac OS) to invert your selection so the background becomes the traced part. Another way you could do this is by tapping on the Select icon at the top of Photoshop windows and then choosing Inverse from the drop-down menu that appears.

Now that you’ve inverted the selection, press the Delete or Backspace button on your keyboard to eliminate the current background, which will become transparent, with a gray and black checkerboard pattern.

Export the image in the proper web-ready format.
Now that you’ve successfully created a transparent background, you must export the file to your PC hard drive in the correct format to ensure that the image is permanently displayed.
You can select multiple formats to save your pictures, but PNG 24 is the perfect one. This is because of the multiple layers of transparency the format creates on images. To save an image in PNG 24 format in Adobe Photoshop, use these hotkeys:
Shift + Alt + Ctrl + W (Windows)
Shift + Option + Command + W (Mac OS)

In the popup box under File Settings on the right side, set the file format to PNG and check the Transparency box. Please Don’t check Smaller File (8-bit)—this converts the file to a PNG-8 low resolution.

Once you have set everything, click the EXPORT button and select a location to save your file. You can also save your file in another way; please check the section below.
Save the Image
Better yet, you could tap on the File tab at the top of the program, select Export, and then choose Save for Web ( Shortcut key: Alt+Shift+Ctrl+S). A preset dropdown menu bar will appear on the right-hand side of the dialog box. Select PNG from the list. Click on SAVE at the lower right corner of the window.
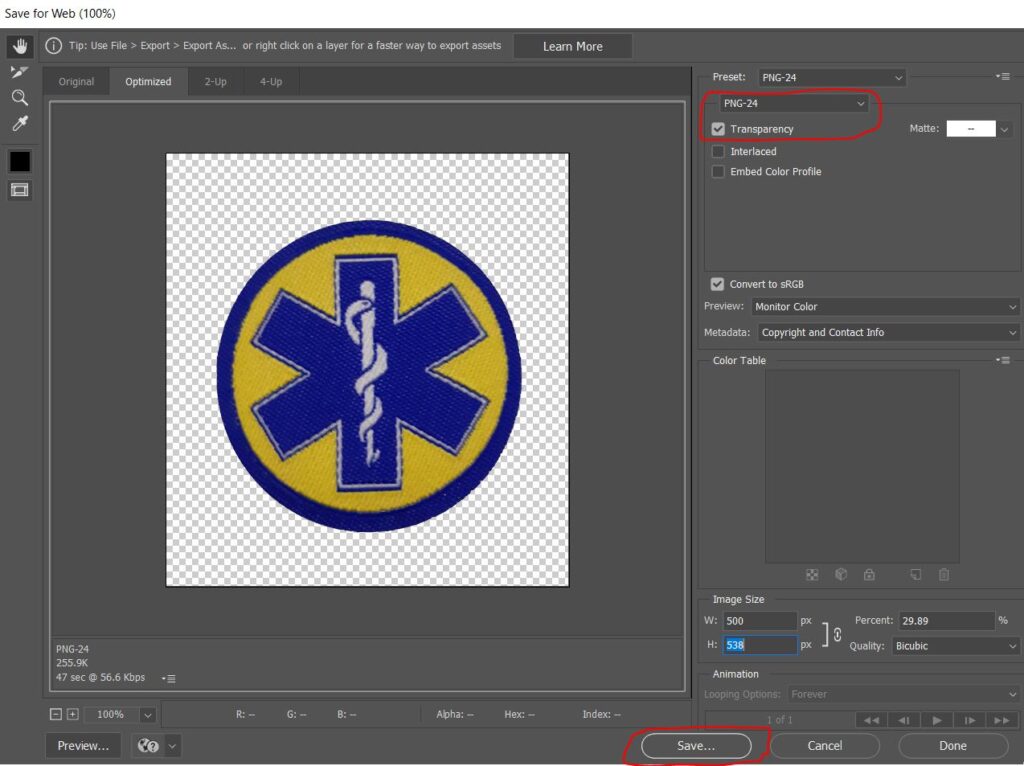
A save dialog box will pop up on your screen. Select a destination folder to keep the edited image, name the file, ensure that it is in .png format, and hit the Save button to validate your request. All done! You have successfully created a transparent background file in Photoshop.
Watch the Video Tutorial
How to Make White Background in Photoshop?
You can do it quickly if you want to display your file with a pure white background or any other color background. Remember, we have created layer 1 on the layer panel. You can add any color background to your image using Layer 1.
1. Drag Layer 1 and move it under Layer 0.
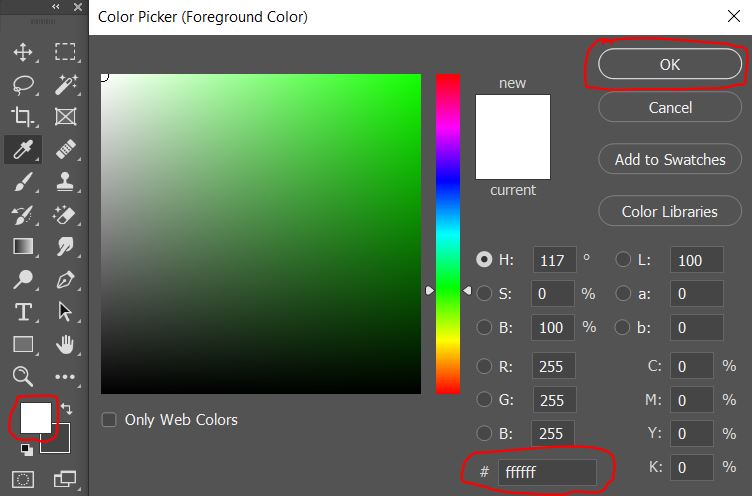
2. Set the Foreground color to white or any other color you want.
3. Select Layer 1, then press Alt+Backspace, and you will see the white background underneath your product image.

4. Save the file in a jpeg format. File — Save as — Select format Jpeg –> Ok.
How to make a transparent background for a logo in Photoshop?
The logo is very important for identifying a website or business. So, you should use a transparent background logo on your website or everywhere because transparent backgrounds are suitable for all kinds of backgrounds. If you have a JPEG logo file, then you have to remove the background in Photoshop and re-save it as a PNG 24, the same as the above process.
1. Open your logo in Photoshop. Click File > Open and navigate until you can see your logo image. Click Open.
![]()
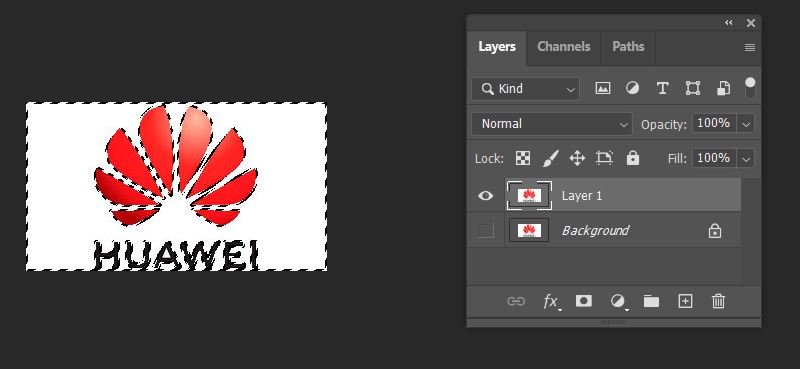
2. To duplicate the background layer, press Ctrl+J. This will unlock the background layer and duplicate a layer called Layer 1. Now, uncheck the eye icon from the main background layer.
![]()
3. Now select the magic wand tool and the object. Before selecting the object, make sure to select layer 1 from the layer panel.
4. After selecting the object, press DELETE or Backspace. This will remove the background from your logo image and make it transparent.
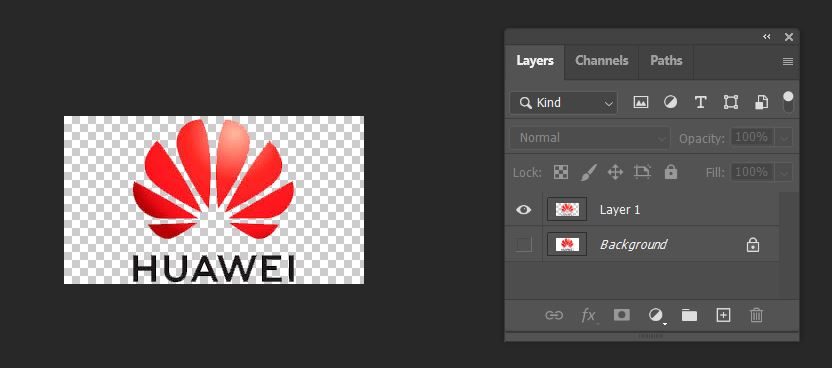
5. Now save your file as a PNG 24 format. Follow the above file-saving process, which we did earlier for the product photo.
Conclusion
That’s how to make a transparent background in Photoshop. Where can you find the guide?
Simple right?
Well, thanks to the simplicity of the Adobe Photoshop software user interface and its speed of operation, Follow the stepwise guide given in this article to transform your solid color background image to make a transparent image in Photoshop. If you don’t have sufficient time then you can hire us to feel free, we will make your image transparent without losing quality.


1 Comment
Together with all the Layer 0 picked, utilize the Transfer device to alter the picture’s job within the clipping mask. Open up the image that you wish to utilize to your skillet. This picture will be put about the Desktop Layer.