
What is Clipping Mask in Photoshop?

If you want to learn what a Clipping Mask is in Photoshop, you have come to the right place. In this tutorial, we will compare Image Masks and Clipping masks.
Sometimes, you need to merge multiple images in Photoshop. You might need to do that for posters, pamphlets, and photo-editing. Clipping Masks and Image Masks can help you do that. You can make exciting frames for images, nice typography, or custom image layouts.
After following the step-by-step guides in this article, you can easily create Clipping Masks in Photoshop!
Table of Contents
What is Image Masking?
Image masking allows you to hide portions of the image and reveal the portions underneath. This is a helpful feature to learn if you want to learn image editing. Image masking lets you create some unique designs in Photoshop, and there are different ways.
Image editing takes some time to learn, but techniques such as image masking can make things easier for you. There are three main types of image masking;
- Layer mask
- Alpha Channel mask
- Clipping mask
These masks all work in different ways. Let us take a look at each one of them in detail:
Layer Mask:
The first type of Image Masking is Layer Masking. This can remove portions from the image background. It can be used in posters and pamphlets.
Alpha Channel Mask:
Alpha Channel masking is a little harder, but it can also help you create unique designs. It adds an extra channel to the image.
Clipping Mask:
The Clipping Mask allows you to select a part of an image and use it in any way you want. Next, we will examine clipping masks in detail.
What is a Clipping Mask?
A clipping mask is an exciting feature in Photoshop cc. It is built from a group of layers to which a mask has been applied. This works the same way as cutting out shapes in one piece of paper and pasting this paper over an image to create a frame.
To create a clipping mask in Photoshop, you need at least two layers. You can also use the image of your choice. The Image is placed on the bottom layer, and then the topmost layer is converted into a clipping mask.
You can add patterns or shapes of your choice to create a beautiful effect that you can use to create image frames or in graphic design. You can also add multiple layers and create beautiful designs in Photoshop.
Comparison: Clipping Mask vs Image Masking
Most people confuse the Clipping Mask with the Image Mask in Photoshop. But they both mean slightly different things.
In short, image masking is a broader term that covers different masking techniques. A clipping mask is one of the many techniques that fall under the umbrella of image masking.
Here are the significant difference between clipping mask and image masking:
- Image Masking includes Layer Masks, Alpha Channel Masks, and Clipping Masks. A clipping Mask is a single technique for removing portions of an image.
- You always need to create a Clipping Mask over the topmost layer. If you want to remove portions of the image, you can create a Clipping Mask over them after selecting them.
- You can also create an Image Mask for more than one image, but all the pictures you want to use in a Clipping Mask must be in the same layer or group of layers.
- The processes of creating Layer Mask, Alpha Channel Mask, and Clipping Mask are different, and some techniques take longer than others.
- The results produced by Image Mask are also highly different. You can use the three kinds of masks for other things.
If you are still confused about what a Clipping Mask is and how it works, check out our guide below to learn how to create one in Photoshop.
Guide to Creating Clipping Mask
A Clipping Mask can be quite handy if you are looking for ways to create beautiful designs. Let’s take a look at how to make clipping masks in Photoshop.
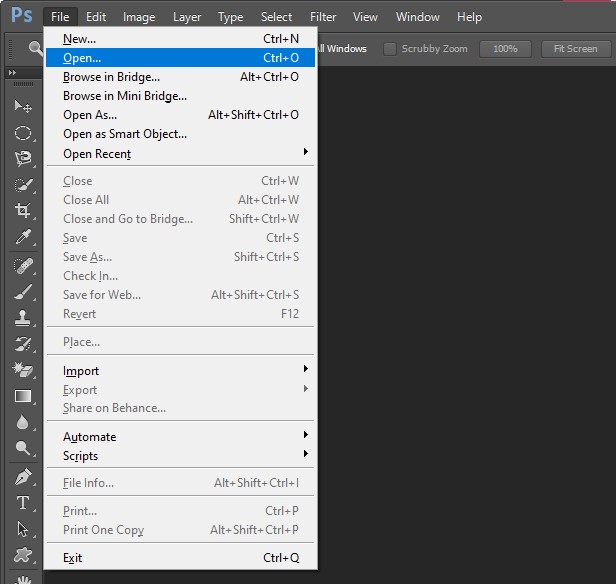
Step 1: Open the Image
The first step is to open the image in Photoshop. Go to File-> Open and browse the image you want to use.
You will use this image as the primary layer to create the Clipping Mask. You can use a photograph, a landscape, or any pattern.
This original layer is locked by default, but you can unlock it by clicking the lock sign in the layer panel. This image layer will be converted into Layer 0. Now, you can make changes to this image.
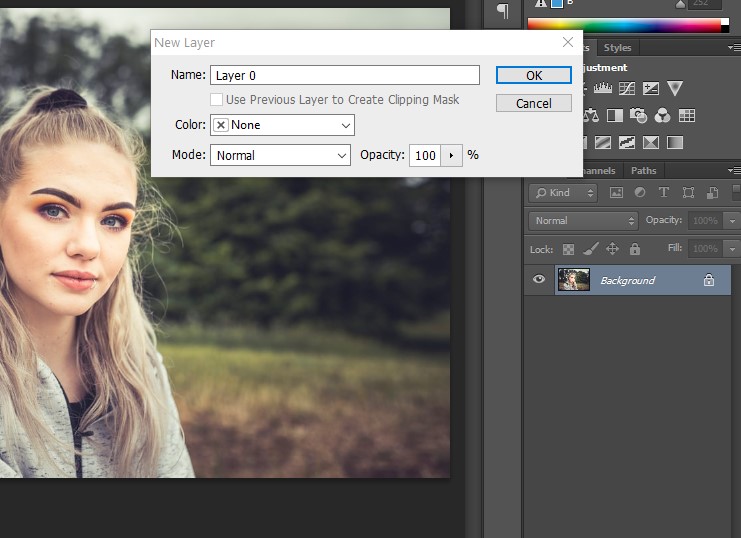
Step 2: Create a New Layer
Now, create a new layer in Photoshop. Click on the New Layer icon at the bottom of the Layers panel. This will create a new layer for our Clipping Mask. Place this layer above the image layer 0.
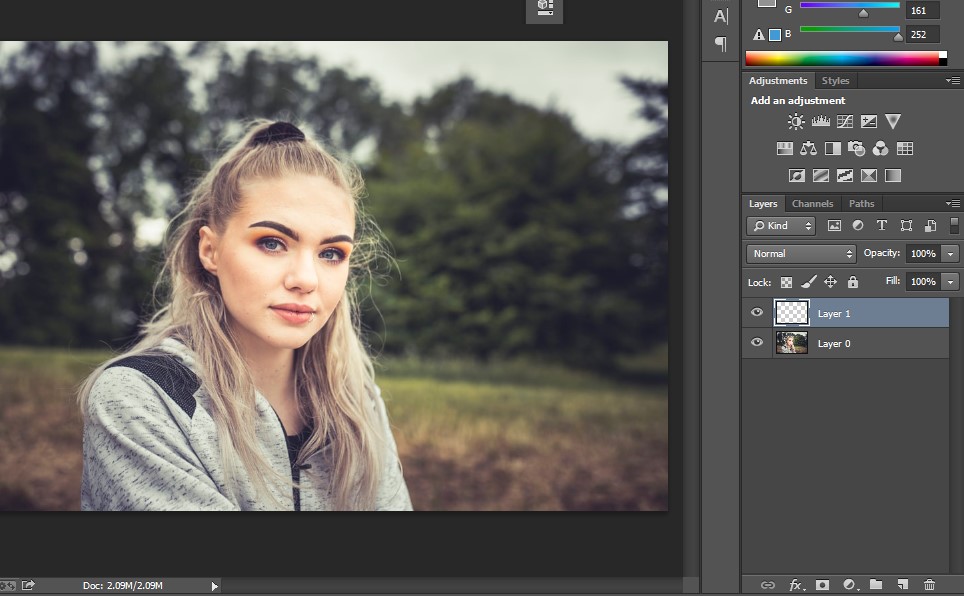
Step 3: Make a Selection
Now, you need to select a portion of an image. You can use any of the selection tools from your left-hand side. Photoshop comes with various selection tools that you can find in the toolbar.

We will use the elliptical marquee tool. Make a selection on the topmost layer, directly above the image. This selection includes the portion you want to see inside your frame.

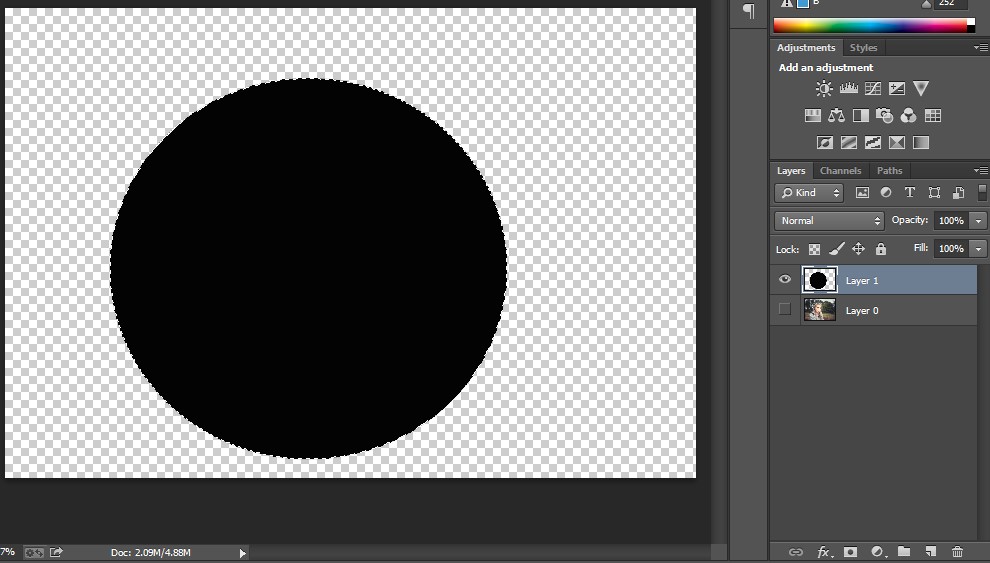
Step 4: Fill the Selection
You can turn off Layer 0’s visibility so you can see only your selection on transparent Layer 1. We will now fill this selection to make it more clearly visible. You can pick any color or pattern to fill it.
Go to Edit->Fill. Pick the color of your choice.
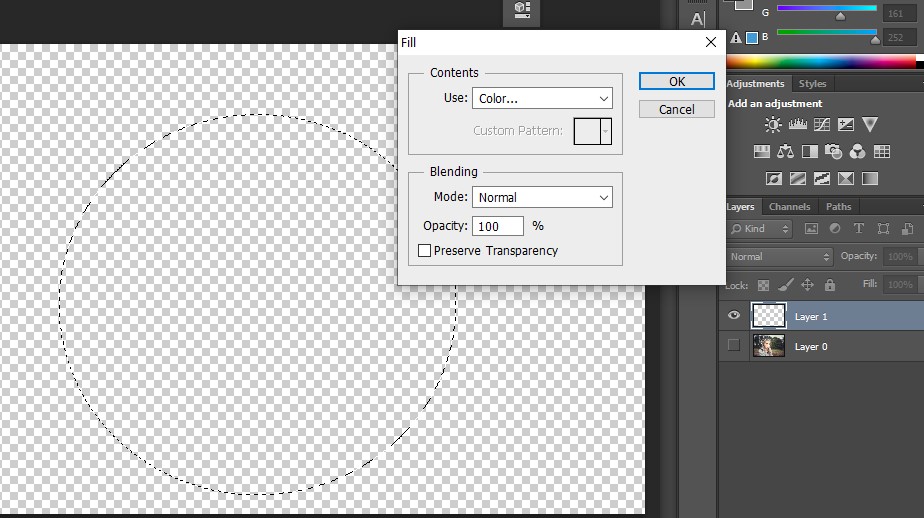
You will now be able to see colored selection on your screen. Don’t worry this color will soon disappear and you would be able to see your image through the clipping mask.
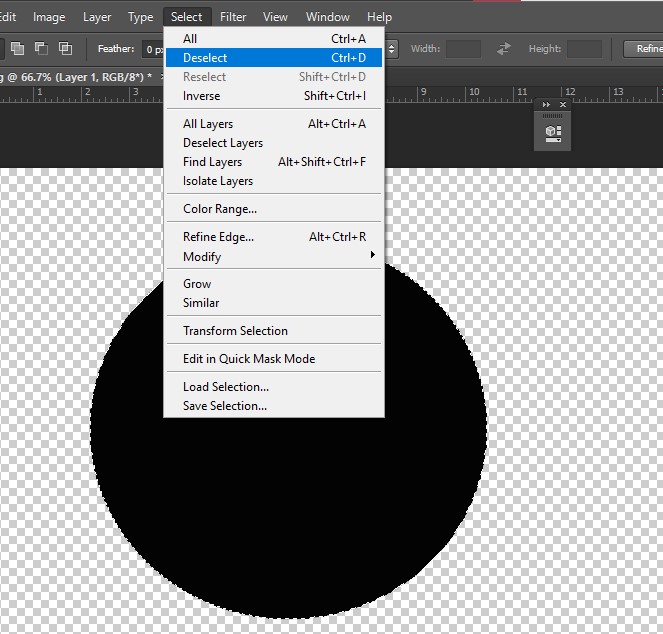
Step-5: Deselect
Once you have filled in the selection, you can deselect the selected region. The filled portion will act as your guide to creating a clipping mask; you no longer need the selection.
Go to Select->Deselect or press Ctrl+D
Step 6: Create a Clipping Mask
The last and most crucial step is to create a Clipping Mask with the image layer and the layer with the selection. Now that you have made the layers, this step is pretty straightforward.
First, turn on the visibility of the layer with the image. Move the Layer 1 below to Layer 0. You will now be able to see the image.
With Layer 1 selected in the Layers panel, right-click on it to open the menu. Find the option that says “Create a Clipping Mask”.
You can also use the shortcut key “ALT+CTRL+G.” Before creating a clipping mask, make sure you have the layer with the image selected in the Layers Panel.

This will completely change how your image appears in the window. The portion that you selected earlier will now be converted into a frame.

Step-7: Add another Layer
The last step to converting your image into a clipping mask is to add another layer and move it to the bottom of the Layers Panel. This will act as the background of your frame. You can use another image.
With Layer 2 selected, go to File->Place. Browse the image you want as a background and place it in Layer 2. Resize the image to fit the layer.
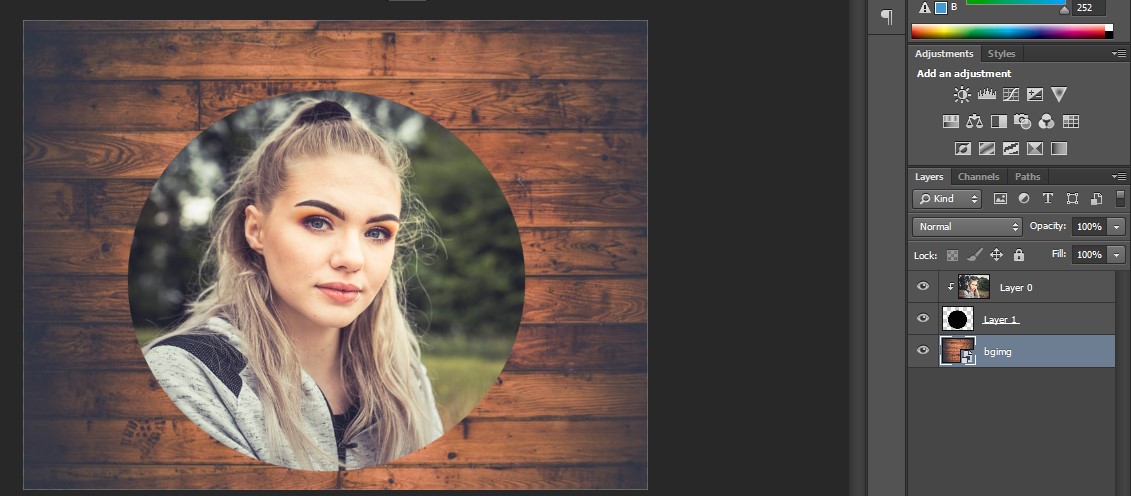
Step-8: Finalize
If you are unsatisfied with your final product, you can always move the image around until you are satisfied. You can also crop the image. Once you are done, you can use the final result on any site or in graphics. This can make your site and designs look trendy and beautiful. You can even get it printed and framed.

That’s it. As you can see, the Clipping Mask is not very hard to make. It takes a little practice, but you can use the Clipping Mask in graphic design and impress everyone with your skills.
With the Clipping Mask, you can make some cool designs. You can also use any of the shapes given in Photoshop to create a Clipping Mask instead of the Selection Tools. This can be helpful, especially if you are making something like a scrapbook.
Another fun thing you can do with the Clipping Mask is create a topography design. Put the image in the background layer, add a Text layer over it, and click on “Create a Clipping Mask” with the background layer selected. You can use it in posters and web designs.
Final Verdict
Image Masking includes several different techniques for creating beautiful designs in Photoshop. Clipping Mask is one of these techniques that falls under Image Mask. It can create image layouts, topography, frames, and posters.
The Image Mask in Photoshop is a useful feature. This content was designed to help you learn how to create Image Masks, especially Clipping Masks. You can use Clipping Masks anywhere you want in Photoshop.
You need only keep practicing. Once you become an expert, you can use the Clipping Mask in your designs.


