
How to Change Color of Objects in Photoshop?

How to Change Color of Objects in Photoshop?
Do you find the color of the object(s) in your photograph unsuitable for your projects? And now you would like to change it with Photoshop but don’t know how to Change Color of Objects in Photoshop? Continue reading the article to discover the stepwise guide required to change color of image in Photoshop. No matter, if you don’t have an idea about photoshop or not.
There is no doubt that the color of an object in a photograph has significant importance on the mood of consumers. It gives the end-users of a product insight into what he/she wants to buy from you. Use an interesting color that blends with the message you want to convey to your customers and you get to raise the number of products you supply. Or employ an unrealistic color and watch your product suffer a huge market demand decline. Which do you prefer? Well, I’m pretty sure you want to increase sales. But how do you go about it when the color of your object doesn’t suit your message?
Table of Contents
Stepwise Guide How to Change the Color of Object in Photoshop
Here is the stepwise guide you need to follow when using Photoshop to change the color of the object(s) in an image:
Step 1: Insert an Image
Download and install Adobe Photoshop version 21.0 on your Windows or Mac OS. Once the installation is over, launch the software, and then click on the ’ File — Open ’ tab at the top right corner of your PC screen or press Ctrl+O. You will be directed to your local drive where images are stored. Select an image and then hit ‘Open’ to insert it.

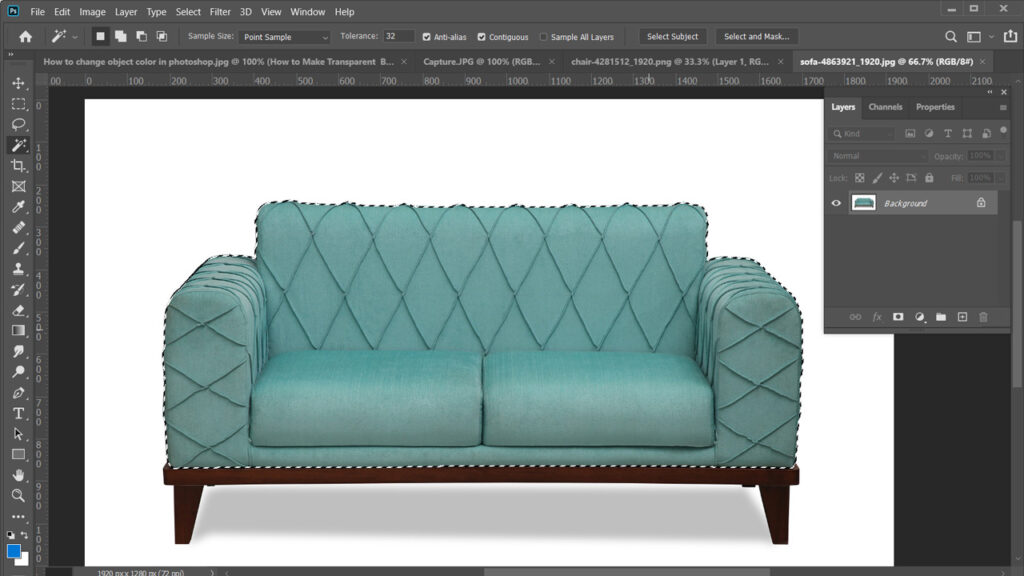
Step 2: Select the Object of your Photograph
Now that you’ve added an image to the software, the next thing to do is to trace out the object that needs color transformation. To do this, select the ‘Magic wand’ tool which is located left sidebar then click the Select Subject from the top bar. Also if you want, you can select the object to draw a clipping path to use pen tool.

After picking the tool, draw a box around the object of your photograph. Ensure that the box covers the whole object. Next, Photoshop will use smart AI to detect the edges. If the edges aren’t properly traced, you can refine them by holding the ‘Shift’ Key, then draw another box around your previous selection. Or better yet you could hold the ‘Alt’ key to erase some parts of your selection.
If you don’t know, how to trace the object very professionally then you should read the article from here.
Step 3: Adjust the Object Color Using Hue or Saturation Adjustment Layer
On completing step 2, some marching ants will move around the object. Go to the ‘Layer’ panel on the right, click on it, scroll to the ‘New Adjustment Layer’ option, then tap on it. Now select ‘Hue/Saturation’ from the list that pops up. If you can’t see the layer panel on the right side then please enable it from the top window menu.
 Underneath the ‘Adjustment Layer Properties Box’, you will find the ‘Hue Slider’. Drag it to start changing the object’s color. As you move the hue slider, the color changes. So move the slide till you get your desired color.

Hue and Saturation Slider
When you are done with the hue settings, try to adjust the ‘Saturation’ and ‘Lightness’ of the object. A change in saturation will affect the color intensity of the object while the lightness will lighten or darken the area around the object.

Step 4: Refine your Selection
Finally, let’s try to perfect the job done by refining the settings so you can get rid of any halo created while you were changing the object’s color. Select the ‘PaintBrush’ tool to the adjustment layer.
But before selecting the paintbrush tool, go to the adjustment layer, and tap on the ‘Black and White Mask’ so you can refine your adjustments. Use the ‘White’ color to include the ‘pixel’ and the ‘Black’ color to get rid of or exclude them.

Change Color of Objects in Photoshop
Now select the ‘PaintBrush’ tool, and then hit the hotkey ‘D’ on your keyboard. You will be given permission to change the foreground and background colors of the image to black and white. Use the white paintbrush on any part of the object you didn’t select in step 2, and the black paintbrush should be used on parts that you chosen mistakenly.
Step 5: Save the Image
To export the image to your hard drive, tap on the ‘File’ tab on the top left corner of your screen, select ‘Save’ (or press Ctrl+S from your keyboard) and a new page will pop up on your screen where you will have to choose a destination folder. Select the file format Jpeg, PNG, or PSD, as you wish then write the file name and click the Save button.
Finally, you have learned how to change color of objects in photoshop very quickly and professionally. If you think the article was very helpful for you then feel free to share the post with your colleagues and friends. Also if you have an opinion then feel free to drop a comment below. Thanks for reading the post.
Video Tutorial
Conclusion
Changing the color of an object using Adobe Photoshop shouldn’t be a hard task to accomplish with this stepwise guide at your disposal. You don’t have to meet expert photographers to help you execute this task. If you don’t have sufficient time or budget to shoot all of the product variants during the photo shoot then you can change color of objects in photoshop very easily by using our method. Also if you don’t have enough to do it myself then you can get our Color Correction Service at a cheap price. We always trace the object to use the Pen tool for the smooth edge. So we can assure you of high-quality color variants services with the fastest delivery. So why late?
Also, You May Like to Read:


