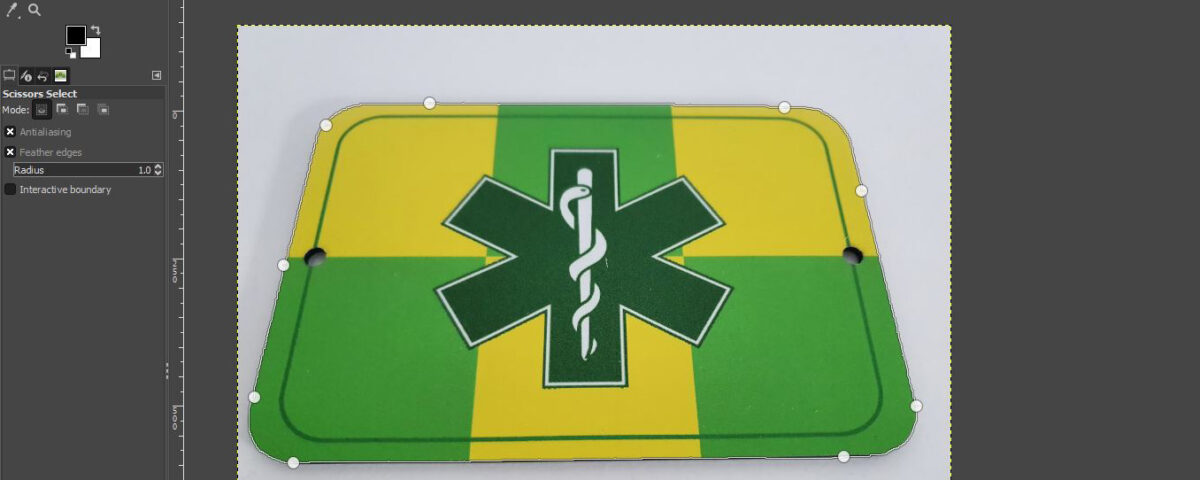
How to use the scissor tool in gimp

GIMP has many selection tools that you may use to isolate a specific region before adding effects. Scissors Select Tool is one of GIMP’s selection tools. This tool operates like the Fuzzy Select Tool, which selects an area based on color similarity.
Scissors Select Tools works best on images with high contrast between the backdrop and the item (the image you want to select). This tool can adjust to the shape of the item in that type of image. To make this more apparent, see the screencast below.
The Scissors Select Tool helps separate a picture with a solid backdrop and blend it with other images for image alteration. Unlike the Fuzzy Select Tool, which selects an area with a single click, selection must be done manually by clicking on places corresponding to the item to be chosen, similar to the Paths Tool. The more nodes you add (the more clicks), the more accurate the tool becomes.
Scissors Select Tools itself has three options:
- Antialiasing: Gently smooth the selection’s edges.
- Feather edges: Softens the edges by blurring the boundary.
- When a control node moves, the path (line) is displayed on the interactive boundary.
Table of Contents
How to Use the GIMP Scissors Select Tool
Open GIMP and choose the image with a solid backdrop.
Click the Scissors Select Tool icon in the Toolbox to activate it. Alternatively, you may use the shortcut by hitting your keyboard’s “I” key.
 Click on the subject’s edge as the beginning point. Create control points along the outline. The ‘path’ of the selection is the line connecting the points.
When you’ve finished selecting, hit the enter key on your keyboard to apply it.
Explanation
Click on the image to begin the selection. It’ll make a news anchor. Finish the selection by clicking on the first node you created at the start.
It has some of the characteristics of a lasso and a path tool.
How to Launch:
- Open Gimp.
- Launch a new image file.
- Now, pick Scissors Tool from the Toolbox or Press “I.”
Click the Toolbox and then press the button “I.”
Modes—This defines how the selection will be created, such as whether it will be merged with an existing one.
Antialiasing is the process of drawing a smoother section of a selection.
Feather Edge—This blurs the boundaries of the specified part. For a smooth edge, set the feather to 0.5 – 1.
Interactive Boundary – After establishing a new node, the curves will be produced instantaneously.
How to Use:
Click on any part of the image to choose it.
Left-click the mouse to select. This will get you points. Begin the selection and work your way through it.
Now, create points in the entire image and ensure the end point is joined with the 1st point.
After that, just hit the ENTER button on your keyboard, and then the image will be selected.
Done! We have selected the image to use the scissor tool. Now, you can remove the background or edit anything whatever you want. Thanks for reading the post.
Read More:


