
How to crop images in gimp

how to crop images in gimp
The Crop Tool is used to crop or clip a picture. It works on all of the image’s visible and unseen layers. This tool frequently removes borders or undesirable regions to give you a more concentrated working area. It’s also handy if you require a specific picture size that doesn’t match the image’s original proportions.
Like the selection tools, the new crop tool has been improved with the latest version release. Instead of offering resize and move capability, the resize handles resize the crop rectangle. When used in conjunction with other GIMP tools, the tool acts more naturally and reliably. Drag the rectangle by clicking within the region to move it. Resizing in one or two axes simultaneously is achievable by pulling the handle-bars on the sides and corners. Darken the outside area with a significant Passe-partout effect to better understand how the final crop will look. Click inside the crop rectangle or press the Enter key to validate cropping.
When the mouse becomes the moving crosshair, you can move the crop rectangle using the keyboard arrow keys. Holding down the Shift key allows you to travel in 25-pixel increments.
Guides can be used to place the crop area. Make sure the View Snap to Guides option is turned on.
Table of Contents
Crop images in gimp
- Crop tool on the toolbox.
- Shift + C on keyboard = crop.
- Tools > Transform Tools > Crop on menu bar = crop.
CROP TOOLBOX- METHOD 1
Cropping is possible in Gimp by utilizing the crop tool and several choices from the Image menu in the menu bar. In this blog post, we will go over both of them one by one.
- To open an image in Gimp, go to the File option in the menu bar at the top of the user screen and choose it. Click the Open option in the scroll-down list, or use Ctrl + O as a shortcut key.

Now, please select the image you wish to crop from this dialogue box and press the Open button once you decide.

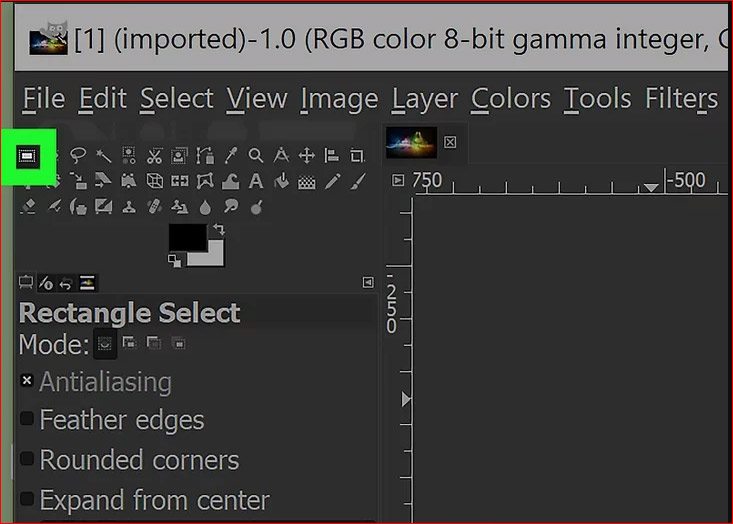
This icon identifies the Crop tool on Gimp’s Tool panel, located on the left side of the user screen. To access this utility, you may also use Shift + C as a shortcut key.

In Gimp, select the crop tool.
It’s on the left side of the toolbar, featuring a symbol resembling two rulers with 90-degree angles, creating a square.
It may have an icon that looks like an Exacto knife in previous versions of GIMP.
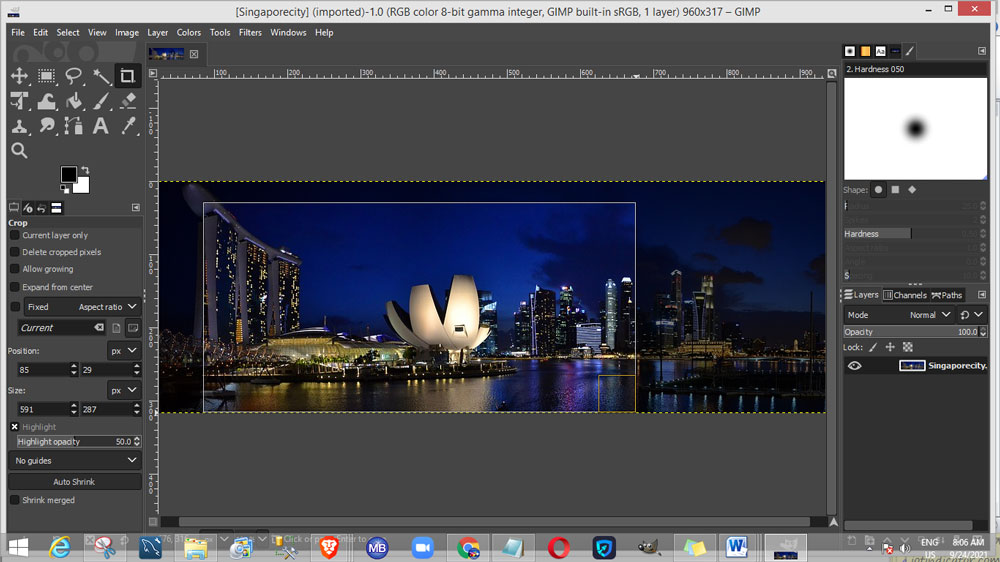
The cropping rectangle should be adjusted: To change its size, click and drag just inside its edges and corners. If you wish to utilize guides, go to the View menu and check the box next to “Show Guides.” This shows rulers at the top and bottom of the image.
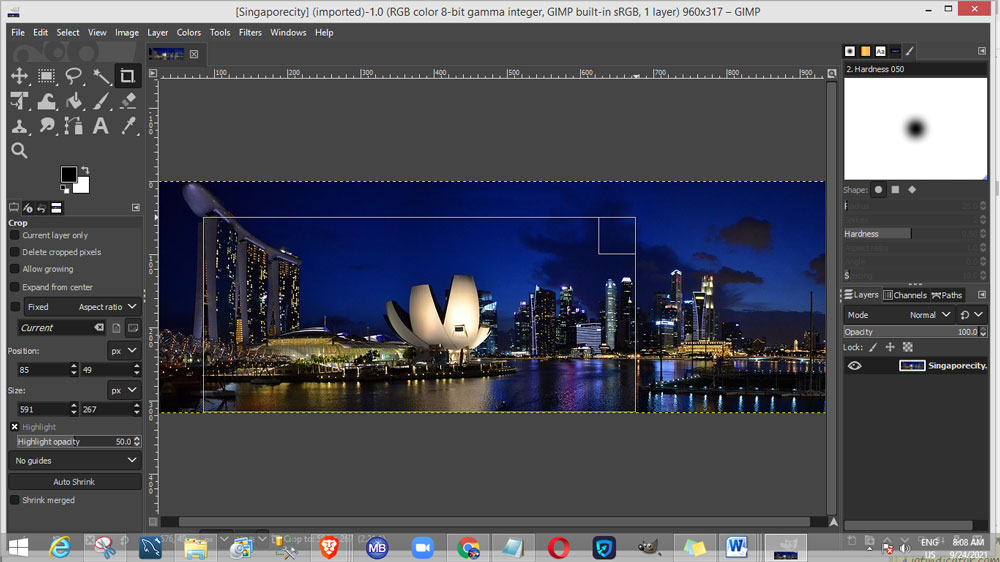
Double-click the rectangle’s innermost region: This cropping method eliminates the dark area outside the rectangle from your image.
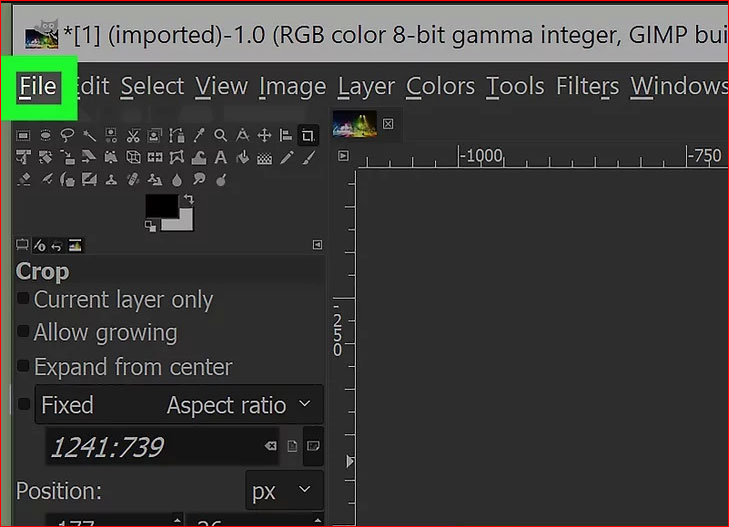
Select File: This is located at the top of the menu bar. It opens a drop-down menu.
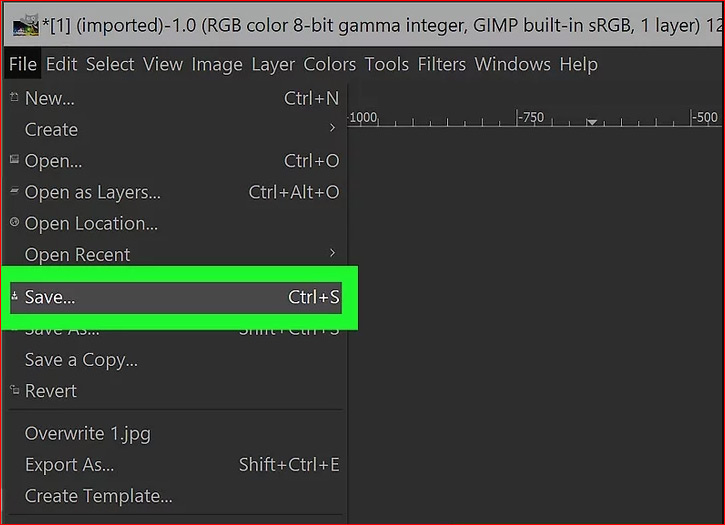
Save your work by clicking the Save button. This saves the image’s cropped version.
To save the image as a separate file, select Save As from the drop-down menu, provide a name for the image, and select Save.
SELECTION TOOL- METHOD 2
Launch GIMP: GIMP has a symbol that looks like a fox holding a paintbrush in its jaws. To open GIMP on Windows or Mac, double-click the icon.
If you haven’t already, go ahead and download and install GIMP for free.
Select File: The file icon is at the top of the screen in the menu bar. Clicking it brings up a drop-down menu.
Click the Open button in the drop-down menu to the right of “File.” This opens the file browser from which you may select a photo to crop.
Choose a picture and press the Open button. Using the file browser, navigate to the image you wish to crop. In the file browser’s left sidebar, you can navigate to different folders by clicking on them. When you’ve located the file you’d like to crop, click it to pick it. Then, in the file browser’s lower-left corner, click Open.
Alternatively, you can use Windows Explorer or the Finder on Mac to navigate to the file, right-click on the image, and select Open With. Then select GIMP.
Click the Selection tool. It’s one of the two icons that resemble a rectangle or oval with a dotted line around it. It’s in the toolbar to the left.
Use the rectangle selection tool to make a rectangular selection. Use the oval selection tool to produce a circular selection.
Create a circle: Drag a circle or oval around an area of the image to create a rectangle with a dotted line inside it around the specified region.
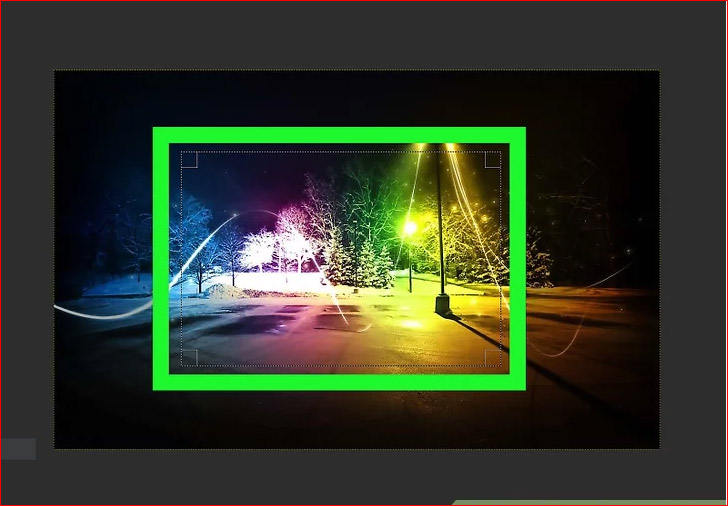
Make changes to the chosen area: You may change the size of the selected region by clicking and dragging inside the rectangle’s boundaries and corners.
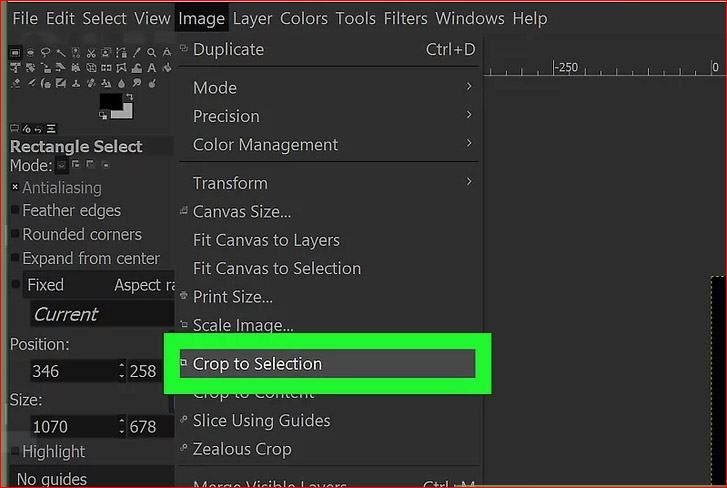
Click on the image to enlarge it. It’s located at the top of the screen in the menu bar. Clicking on it brings up a drop-down menu.

Crop to Selection should be selected: It’s just below “Image” on the menu bar. This deletes everything except the region included inside your Selection.
Select File: This is located at the top of the menu bar. This brings up a drop-down menu. Save your work by clicking the Save button. This saves the image’s cropped version.
To save the image as a separate file, select Save As from the drop-down menu, provide a name for the image, and select Save.


