
How to add new fonts to GIMP

GIMP, or GNU Image Manipulation Program, is a raster graphics editor, a free and open-source alternative to other programs such as Adobe Photoshop. It has many capabilities for working with images, though it may seem a little complicated to users new to this program. In this tutorial article, learn about the various settings/handles that could be used to make whichever text style you intend.
GIMP, a powerful open-source graphics program, is easy to get the hang of and use. In this Gimp Guide, I will show you how to add new fonts to GIMP so that you can use them for your projects!
Table of Contents
How to Add New Fonts to Gimp
There are three steps to installing a new font. First, find your computer’s ‘Arial’ font through applications like Helvetica Neue Bundle. An internet browser is also needed for the second step to download the fonts desired. An application program to embed fonts will be used in the last step. Begin the journey by opening Gimp and going to: Edit > Preferences > Interface. The top window appears as a search bar to type the font and click on open.

Finding and Installing Fonts on Your Computer
To add new font files to GIMP, we need to search for fonts from font websites. These files may be downloaded from a variety of websites. Most are free, although with a restricted number of characters or acceptable quality. So the first step is to get third-party fonts for GIMP. Websites like dafont and wfonts are excellent resources for finding a wide range of fonts for the platform. If you enjoy a few unusual ones but don’t know what they’re called, you may utilize Chrome extensions to identify them. Fonts will add cool effects to your social media posts or content if you want to post creatively.

Download the font you need
When you have discovered the font you intend to add to your GIMP, download fonts on fontsquirrel.net, for example, to your computer. Installing fonts on your computer is different depending on operating system-specific procedures. Fontsquirrel, for instance, offers an entire library of fonts that you can use for free. Upload your chosen font to a selected folder. On Windows 10, your fonts will be in the C: Windows/Fonts folder, whereas Mac OS X will be in the /Library/Fonts folder. On Linux, they will be in the /user/sharefonts folder or equivalent.
Tips
- There is considerable danger in downloading things from the internet. Before unzipping the downloaded files, scan them with a reputable anti-virus application.
- Remember to always install your font in your normal font folder, not just copy the font file into some random folder on your computer.
Extract the File
After downloading the font on your computer, you must extract it before using it. Open the .zip file containing the font that you downloaded. Depending on the software used to create the zip file, you’ll have to open it in a compatible application. Double-click the icon to open the archive, then click Extract All on a Mac or Extract Scratch folder in a Windows Explorer window. Open the font folder in a font manager program. If you don’t have a font manager installed on your computer, check out FontForge or Universal Type Server ( Truetype or OpenType fonts). Font managers can help you preview the font’s glyph, configure the font for use on your computer, and provide additional information.
Installation of font to GIMP
Installing the new font to Gimp is pretty straightforward;
Step 1: To open the zip file, double-click it.
Step 2: Then, in the file archiver of your choice, extract the files contained therein by clicking the Extract button. Alternatively, if you only use the default File Explorer, you may drag and drop the files to the desired place.
Step 3: Right-click the OTF or TTF file and hover your mouse over ‘Open With’ to see all possible options.
Step 4: From the drop-down option that appears, select Windows Font Viewer.
Step 5: To install the font, click Install in the top right corner of the Windows Font Viewer.
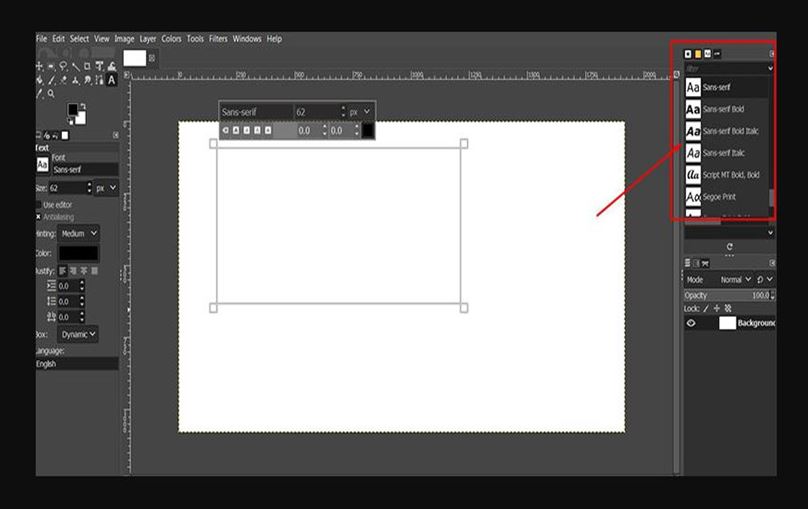
Step 6: Launch GIMP and navigate to the Fonts tab in the toolbar on the right. Then, look for the font you just installed.
Step 7: If the font does not show, you may select Rescan Font List from the Fonts Menu by clicking on the little tab configuration button in the top-right corner.

Adding fonts to GIMP
To add fonts to GIMP, open the Windows control panel, choose to open ‘Fonts,’ then select file>Import at the menu bar (you need to be in Typography in the Fonts control panel). The ‘Windows TrueType Fonts’ dialog box will be displayed; highlight the .ttf (not the far left ‘Declare Subset’) and choose ‘Open’ to install the font. If correctly installed, this will display a checkmark. GIMP will normally recognize installed fonts after reboot; however, typing control-reload to be sure is harmless. Note that the filename must be the base name of the font with “.ttf” at the end. E.g., if the file is “FooFont.ttf,” it needs to be called “foo-font.ttf” when installing; otherwise, it will never be seen.
Locating and Testing newly added Fonts
If you are unfamiliar with GIMP, you may be unsure how to check your newly added fonts. After adding fonts to Gimp, you can test them by checking Use Fonts in the Image -> Text menu. Alternately, if you have selected some text, one of these font values will be added next to it. Your task will be to convert “Mono Spaced (1024)” into one of these other options. I recommend changing only if the font has been found in the system to All except “No font available” so you can see if and which fonts you might need to add.
Conclusion
Using the steps outlined above, you will find it easy to install and deploy practically any font in GIMP. However, make sure you choose the right font for your project, as typefaces may either make or break your design.


