
Basic Photoshop tutorial for beginners – The basics of Photoshop Software
Are you a photographer who likes to capture special moments every time? Are you also looking for an image editing program to enhance your images? If so, what comes to mind first, of course? Photoshop! In this article, we guide you through the Basic Photoshop tutorial for beginners step by step.
Table of Contents
Which image editing software is suitable for you?
Before you choose Photoshop, please ask yourself your needs and wishes regarding processing your images. This software offers an infinitely creative field that can be complicated and expensive for beginners. A more straightforward solution might be enough for you. If you should now doubt whether Photoshop is the right software for you, you should read our comparison of the different, free photo editing software! Otherwise, our Photoshop tutorial below will be handy to get you started!
Why will you use Adobe Photoshop?
Adobe Photoshop is a leading photo editing software for professionals, passionate photographers, and graphic designers. The program’s tool palette and various filters offer numerous options for editing images. You can also create a professional clipping path and retouch photos and graphics, such as logos for multiple documents (e.g., brochures, banners, business cards, flyers, or posters). Therefore, the software has become essential in photo editing and graphic design.
Also, if you want to remove background from images professionally, use Adobe Photoshop software. The pen tool is one of the best tools for background removal.
Photoshop includes a few versions of the pen tool. The pen tool creates precise paths that can be manipulated using anchor points. The free-form pen tool allows the user to draw paths freehand. With the magnetic pen tool, the drawn path attaches closely to the outlines of objects in an image, which helps isolate them from the background.
The functions and handling are complex, but the logic and the main features are easy to understand. However, only intensive practice helps one become a professional.
Photoshop is paid software available in an Adobe Suite from $31.99 / month (with Lightroom). You can try it out using a full version of Adobe CC 2024.
Photoshop Tutorial: The basics of Photoshop Software
Read below how the work area is structured and how the tools are used:
The work area
When you start Photoshop, you come to the desktop. This includes several areas:

- Tools: The tools used to change the image are located here as standard. The tools have several functions and further sub-categories (hold your mouse on a tool to see its variants)
- Document window: In the middle is the processing area for your photo
- Menu (top line): file, image editing, selection, font, filter, display, window, help
- Options Bar: Under the menu, there are specific settings corresponding to the selected tool
- The menu item “Window”: Different windows appear on the right side depending on the selection. The number depends on the areas you have selected and want to edit (colors, color chart, settings, styles, masks, etc.).
- The Layers Palette is an essential tool for image processing. A Photoshop document can span one to many layers, and the Layers palette shows all layers in logical order.
- Timeline: To use the Timeline tool to animate the Rogue Fitness pictures, open the Window menu and choose Timeline. Select the Timeline from Photoshop’s Window menu to open the Timeline panel.
Tips & Tricks :
Adjust the work area in the main menu> Window> Work area to your needs. The windows are movable and foldable to create more space for your picture. The “Log” is essential for returning to previous settings anytime.
The logic of the levels
Before using Photoshop, you should study its logic and the basic concept of layers.
A Photoshop document sometimes consists of multiple layers. You can think of it as putting different transparent sheets on each other. Each sheet (each level) consists of a separate picture. By “stacking” or stacking all sheets (layers) on the top sheet, all the sheets (layers) underneath with their respective images are visible, and when viewed together, they look like an overall picture.
A layer can contain different elements: a photo, text, graphics, etc. You can add elements or effects to your image with each new layer. The levels can also be quickly, individually hidden, merged or deleted.
The menu
The menu is the versatile gateway to all Photoshop functions. It is multifaceted, often allows direct retouching, and opens access to numerous submenus and editing windows.
File: New, open, close, save, import/export, automate, scripts, print a photo. “Exit” is also found here to close the software.
Edit: You can step forward or backward, copy/paste, undo/redo, free transform, fill, stroke, or apply certain changes. You also have access to Photoshop settings here.
Image: All settings and changes required to develop a photo (mode, size, image quality, image rotation, tonal value, contrast, color, black and white, etc.)
Layer: All functions for managing the layers (creation, duplication, layer mask, vector mask, intelligent objects, alignment, style, connecting, etc.)
Font: All valuable functions for editing a text layer, such as font family, font size, etc.
Selection: Functions to select and edit image areas such as color range, refine mask, modify –> feather, select/deselect, inverse, etc.
Filters: Different image effects (blur, embellishments, render, liquify, lens correction, vanishing point, noise)
View: Elements for customizing the display, such as Zoom in /out, Ruller, etc.
Window: This is where you can show or hide the various functions (options, tools, videos, menu, colors, layers, characters, brushes, etc.).
3D: for 3d image creation.
Help: Help on the different topics of Photoshop software.
Tools
Use the tools to make changes to your photos:
Selection tools: move, rectangle selection, lasso, magic wand, quick selection
Cutting tool: Crop/define cutouts
Measuring tools: pipette (determining color values)
Retouching tools: corrections, stamps, eraser, water drops
Text and graphic tools: pen, brush, text
Color selection (foreground and background color)

Image credit: techstic
Photoshop tutorial: Edit a photo with Photoshop
From theory to practice – read how to remove the background of an image in 6 steps :
1 —Select a photo and open it: File> Open or press CTL+O. Your photo is now in the document window. You have previously adjusted the work area to your needs (menu window). If you don’t know how to open a file in Photoshop, then click the link.
2
– Now use the pen tool (or press P) and clip the path of the entire image.
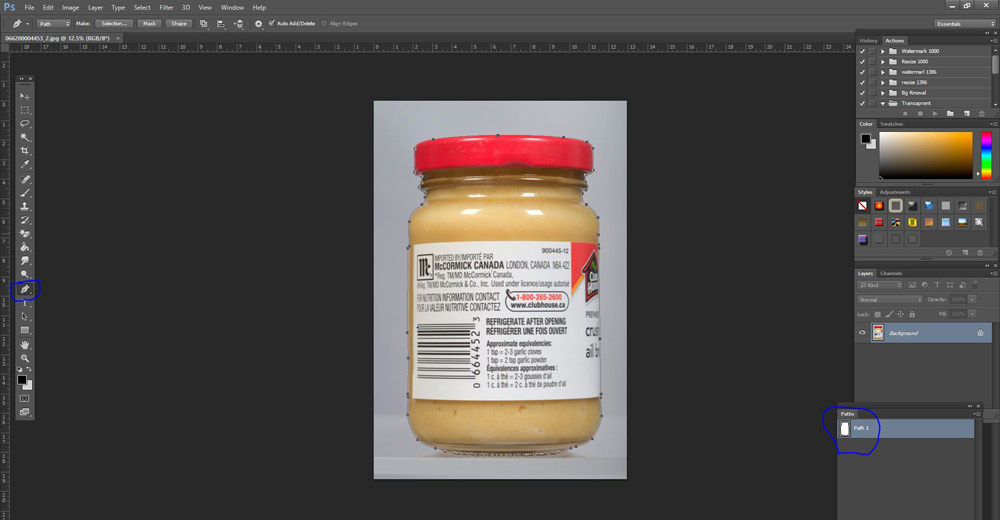
3 – Select the path then press CTL+ENTER from the keyboard. Path selection will look like the below image

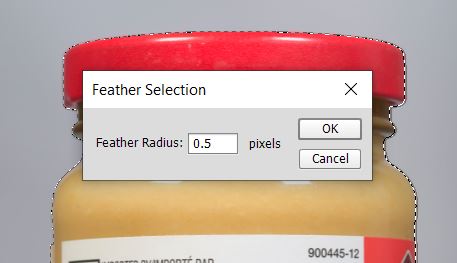
4 – Now, add feather for a smooth edge. Press SHIFT+F6 or from top menu click Select–> Modify–> Feather –> Feather radius 0.5 –> OK
5 – Now press CTL+J to duplicate the layer and hide the eye icon from the main background image. (See the layer section on the below image)
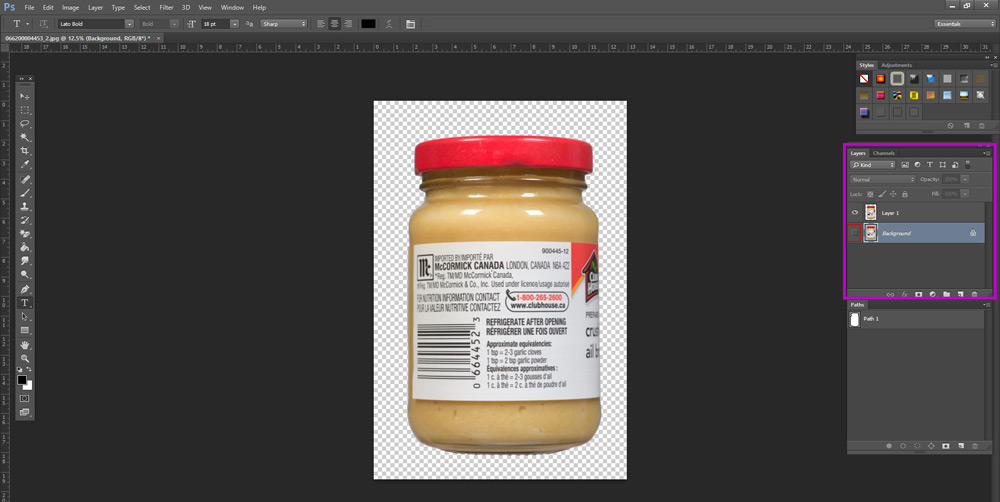
6 —Your photo is ready! Now, all you have to do is save it: press CTL+SHIFT+S or File> Save As> Save PNG format.


5 Comments
Thanks a lot for your great post about basic Photoshop. I really enjoyed it.
[…] present. Now select a Brush device, like Paintbrush or Pencil. Then click on the Masks Mode button. Photoshop will cowl the unselected components of the […]
[…] Basic Photoshop tutorial for beginners – The basics of Photoshop Software […]
[…] Basic Photoshop tutorial for beginners – The basics of Photoshop Software […]
I really appreciate this post.