
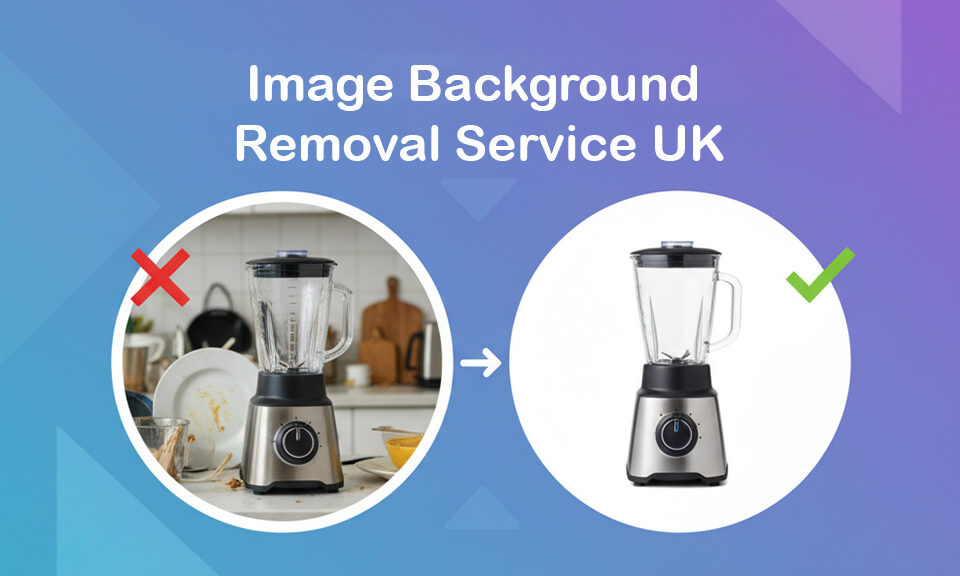
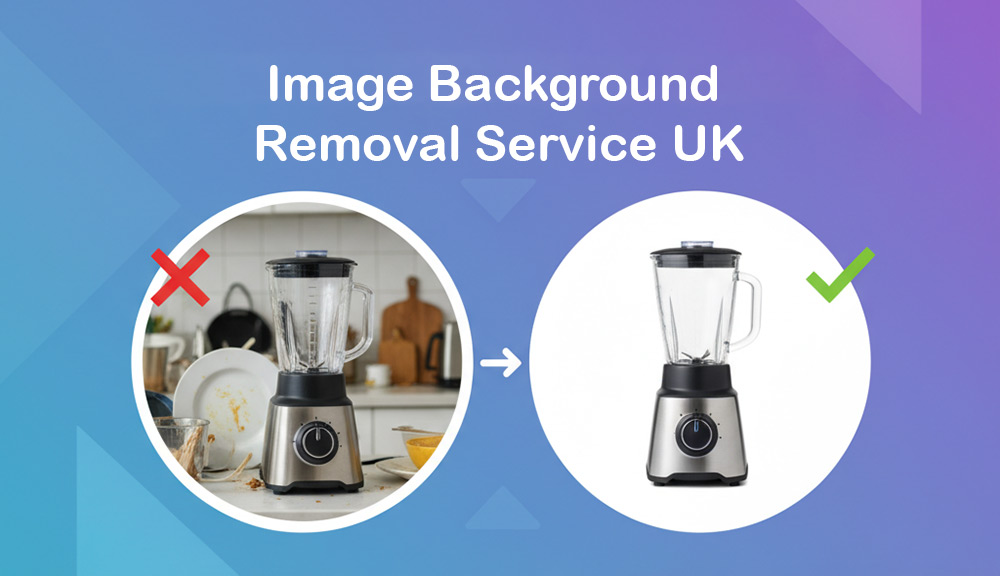
How to remove the background in Gimp

Backgrounds in our photos can often be distracting and not add anything significant to the photo. To help you remove the background in gimp, we have put together this blog article. Follow the steps below, and your picture will be perfect!
Table of Contents
How To Remove Background In Gimp
First, open up Gimp and find the Background layer. Now, see if you can see a layer called Layer 1 under the Background layer. If not, click on the menu option Layer -> New -> Layer 1 at the top of the screen. Next, we will want to zoom out and select our picture by pressing “Ctrl” and then clicking and dragging on it with your mouse. To do that, press “Shift” and then click and drag anywhere else but on the picture. After all that is done, we will want to change this layer’s blend mode from Normal.
What causes the background to be black
Gimp is popular editing software that lets users manipulate images on their computer or the internet. It’s made up of many plug-ins, but one tool, in particular, is the “Pencil Tool,” which allows users to remove backgrounds from an image. I’ve found that there are two main reasons for this problem. First, the file sets the background color to black (the default), and second, the Gimp uses an outdated version of the paint tool.
Different methods to remove the background
I’ll show you different ways to remove the background. First, try clicking “invert group” and using the eraser to erase your photo. Next, try using a gradient map with an extensive 50-100% range. You can adjust the amount of contrast until the background is removed from your photo. If those two methods do not work, download a plug-in like Unsharp Mask, which will help you remove all the blurry edges in your picture.
There are four tools for changing an image background on GIMP
- Using the Fuzzy Selection Tool
- Using Select by Color Tool
- Using Path Tool
- Using the Free Select Tool
Remove Background Using the Fuzzy Selection Tool
The Fuzzy Selection tool is a popular technique to remove background in GIMP. It is used to pick sections of the image canvas with similar color schemes. The Magic wand is another name for the Fuzzy option.
To effectively pick the backdrop, choosing the correct beginning position is critical. Otherwise, we will receive something completely different from what we desire. If you choose the wrong place, you’ll end in a different zone or perhaps the reverse.
It is useful for identifying things with sharp edges. For the expert user, it is more beneficial than any other tool for picking a specific location. It may also be used to retouch a specific area of an image.
A fuzzy selection tool, in a nutshell, is essential for picture editing. It may be accessed via the Tools-> Selection Tools -> Fuzzy Select menu or by pressing the U key.
To remove the backdrop using the Fuzzy Select tool, follow the instructions below:
Step 1: Open the image
To begin, we’ll open the image we’d like to alter. There are several methods to open a picture with GIMP. However, the usual method is to open a picture using the File menu’s Open option. To open a photo, use the File menu’s Open option or drag and drop the image from our computer.
It will open the picture in the GIMP’s editor window, visible in the GIMP’s center.

Step 2: Include an Alpha Channel
The usage of the Alpha channel achieves transparency. Including an alpha channel in the image is critical to remove the primary item.
Right-click on the current layer to create an alpha channel and pick the add alpha channel option from the layers dialogue box on the GIMP’s UI’s right.

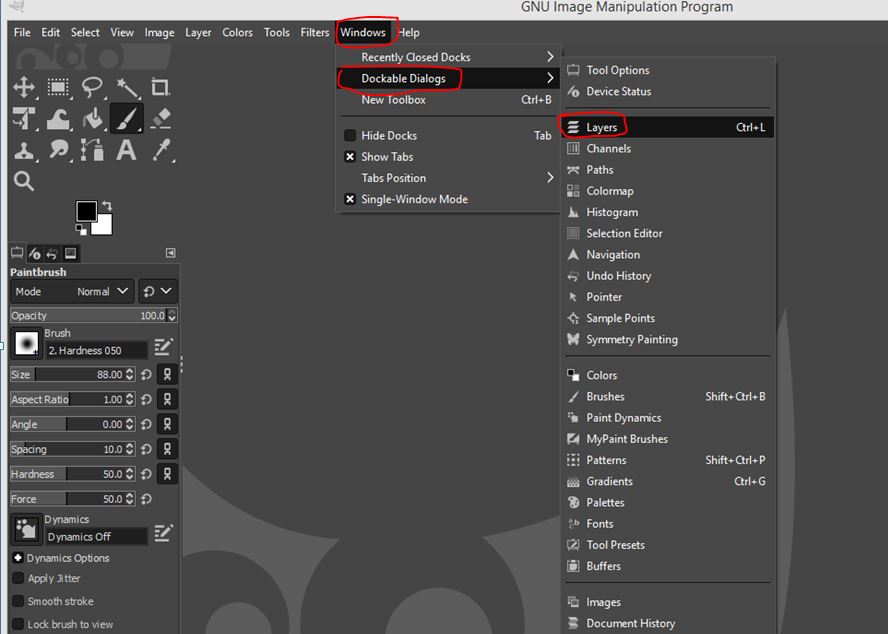
If it is not visible, click the Windows->Dockable Dialogs-> Layers menu item to make it visible.
Step 3: Select the Fuzzy Select Tool
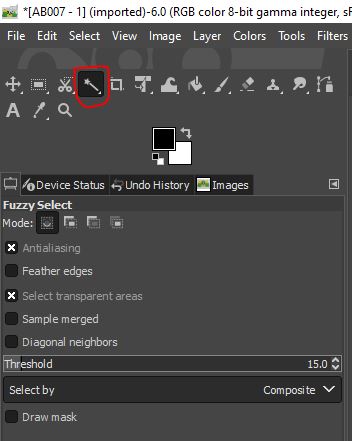
To activate the fuzzy select tool, head to the Tools->Selection Tools menu and activate the Fuzzy Select tool. Additionally, we may pick it by pressing the U key or clicking on the symbol below in the toolbox:
Step 4: Choose a Background
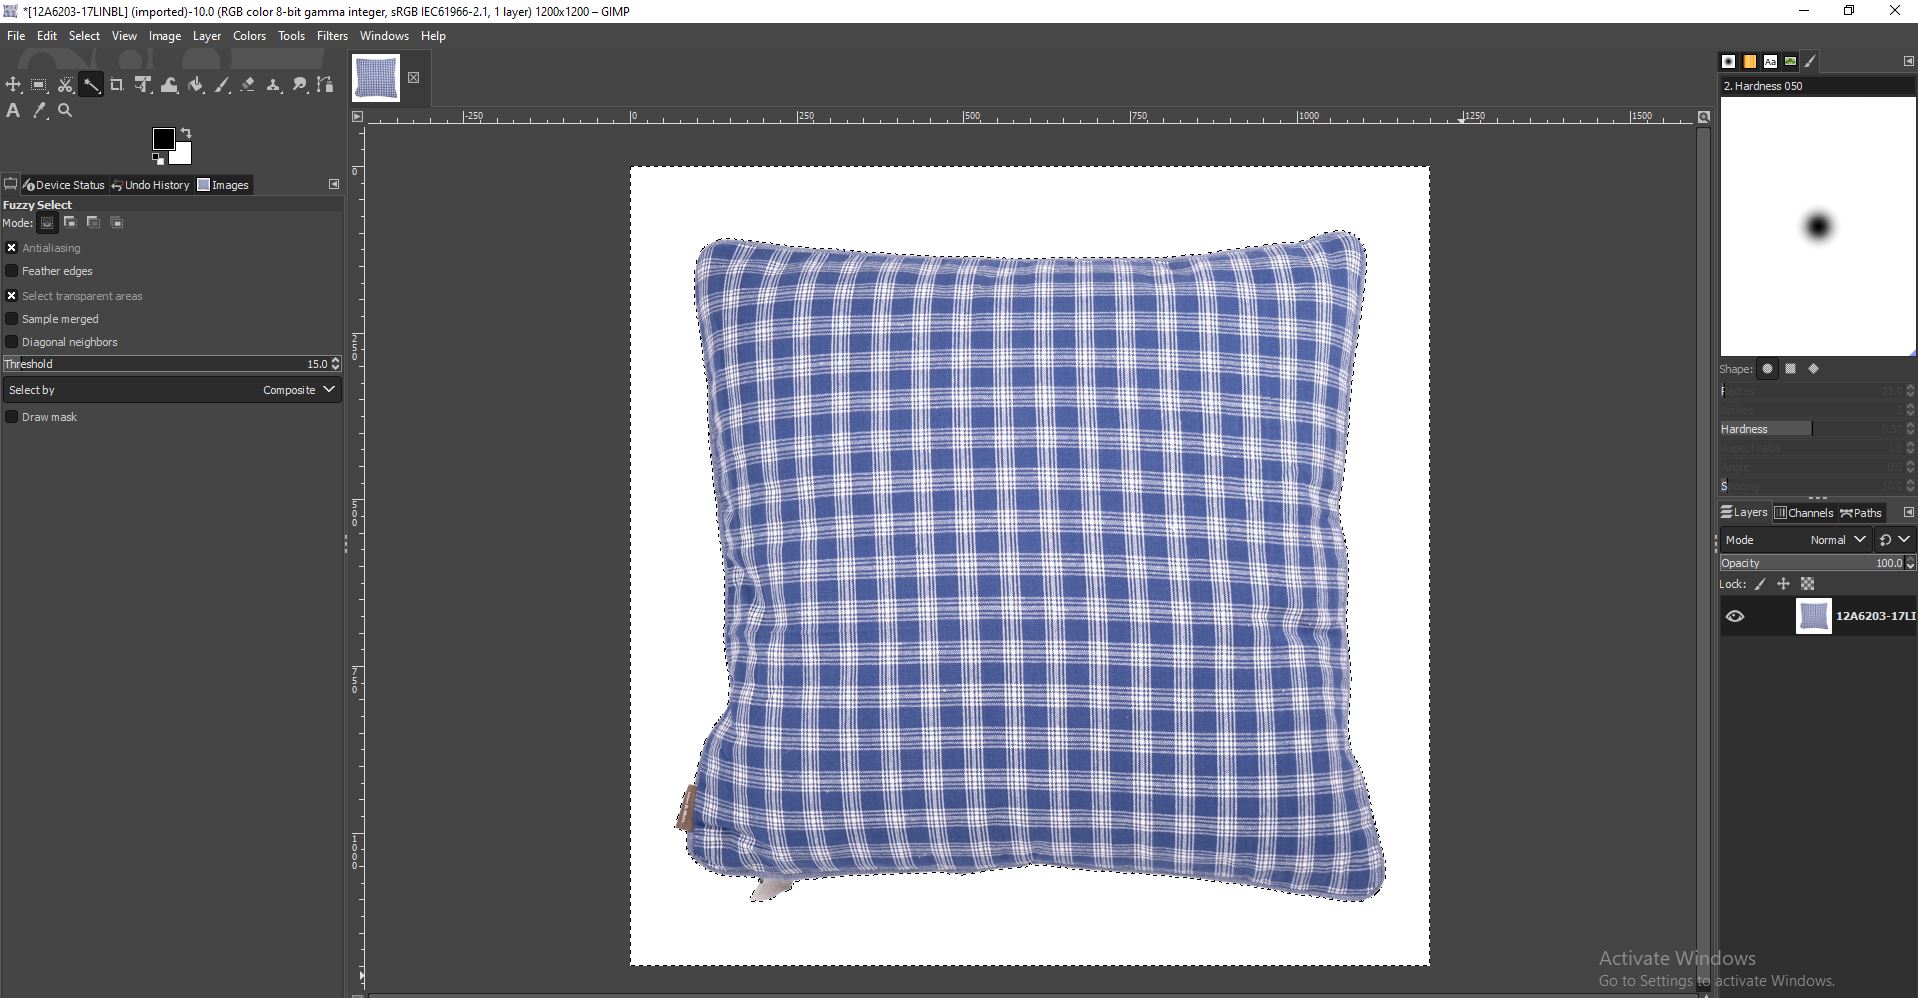
After selecting the Fuzzy Select tool, click on the background to begin picking it. To choose the appropriate background, we must first select the proper beginning point; otherwise, we will not achieve our goal.
Step 5: Eliminate the Background
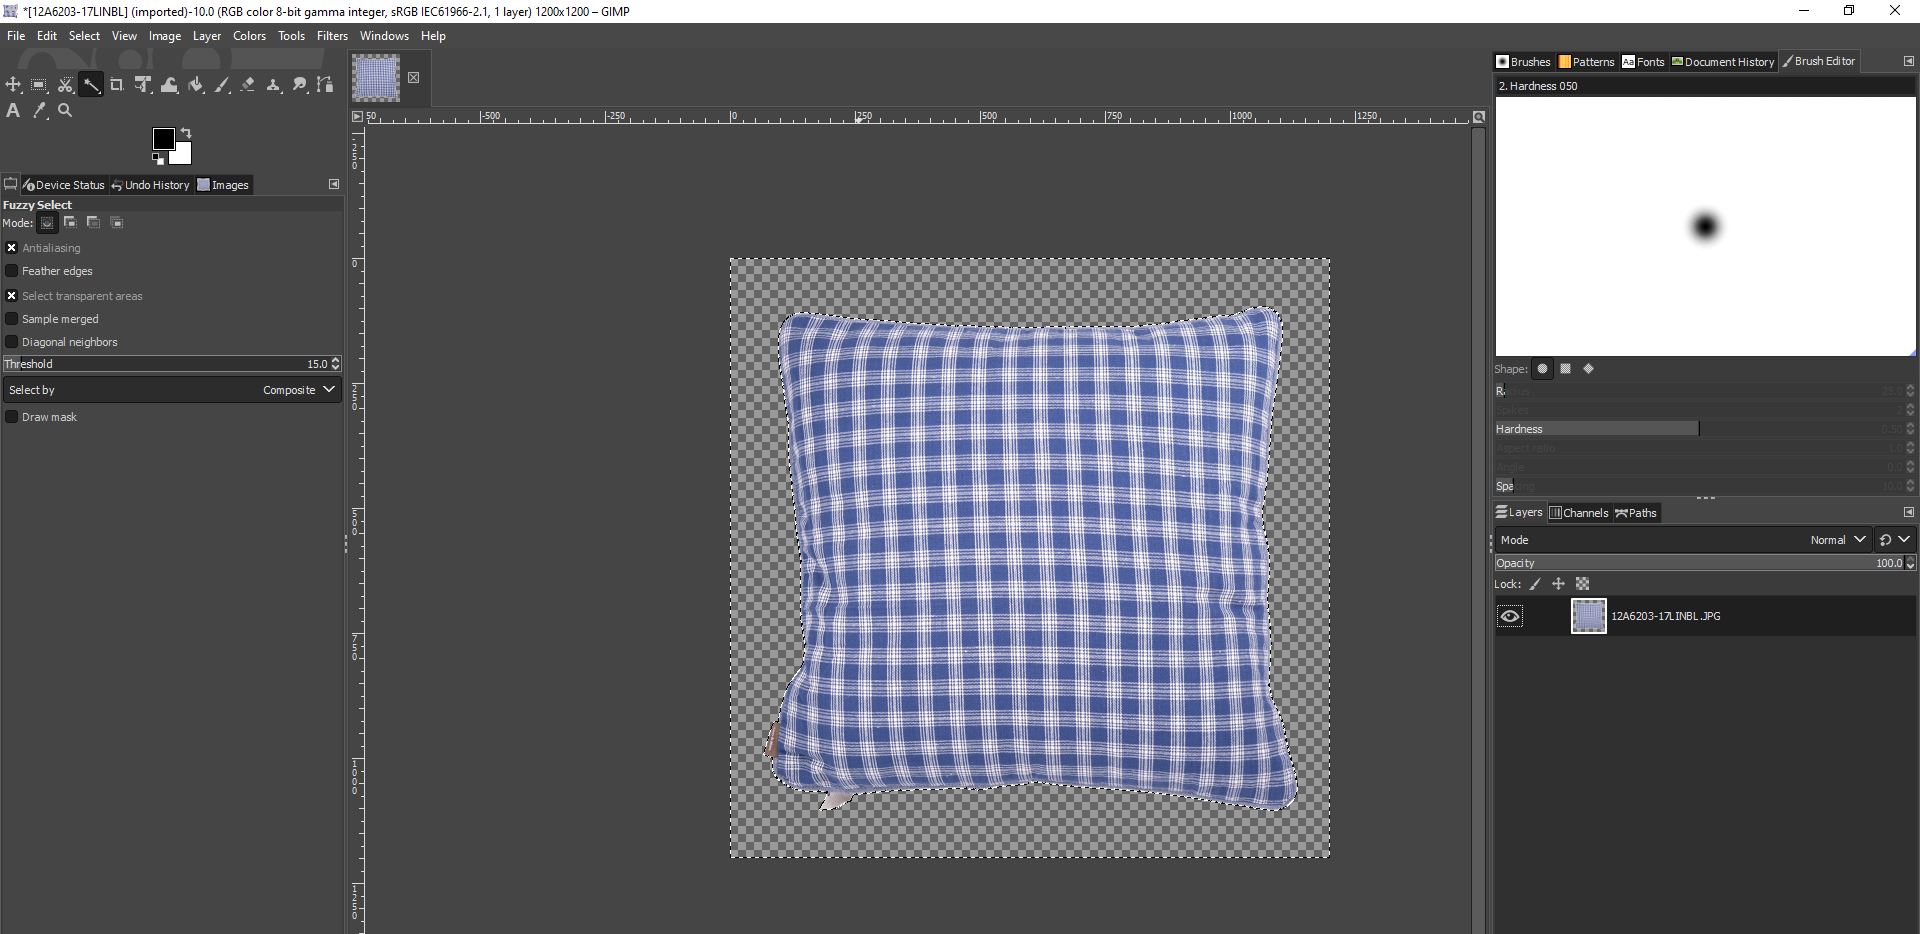
Once the background has been selected, press the Delete key from your keyboard to erase the current background. Continue picking and removing until the whole background remains intact. It will remove the backdrop and display the transparency so we may replace it with another background color later. Additionally, we may save it without the backdrop. If our primary object is accidentally erased, we may restore it using the clone tool. Magnifying the image for optimal quality when picking the backdrop is advised. Hold down the CTRL key and use the mouse to zoom to magnify the image.
Step6: Create a Brand-New Background
Now, we may replace the backdrop with a new one. For instance, suppose we wish to give it a dark backdrop. From the Tools-> Paint Tools menu, pick the bucket fill tool ( Shift+B) and make any color the current foreground color.
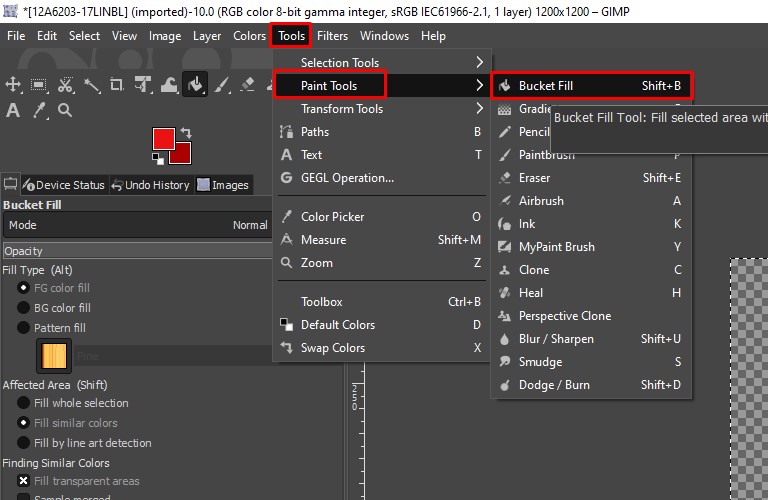
Begin filling it to increase the quality by zooming in on the pixels as you fill the color.

Remove Background Using Select By Color Tool
The Select By Color tool enables us to select comparable colors in the image. It is a more straightforward procedure than the fuzzy choice approach. Picking a start point will select all pixels with the same color surrounding them and throughout the whole image canvas. It’s advantageous to have a constant backdrop color or pattern. However, it will also work for those with uneven backgrounds.
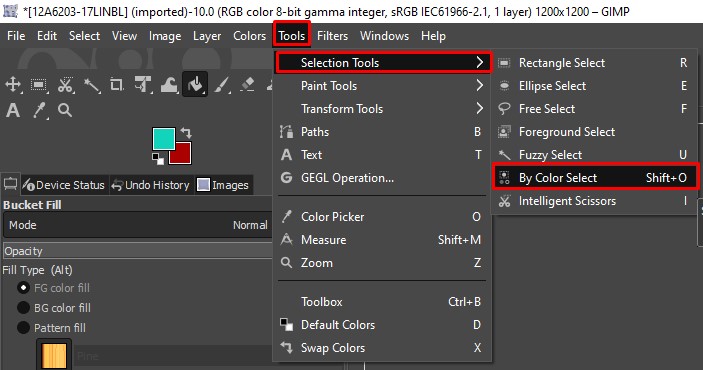
Select the By Color option from the Tools-> Selection Tool menu or press the “SHIFT+O” keys to activate the Select by the Color tool. Additionally, we may pick it by clicking on the symbol below in the toolbox:
Now, we can use it to erase the backdrop. Use the color choice tool to remove the background, open the image, and create an alpha channel (First two steps). Now, click anywhere on the picture canvas to choose a starting point. It will select pixels with comparable color values throughout the picture.

After picking the backdrop, use the Delete key or the Edit menu’s Clear option to delete the chosen portion. We must continue picking and erasing until the entire backdrop is not removed. Zoom the image when deleting it for optimal results.

So, it removes the image backdrop. Now, we have our Main Object image without a backdrop. Fill in the BG Color or picture pattern to create our new backdrop.
Select the Bucket Fill Tool from the Tools-> Paint Tools menu. To fill it with the tool’s active foreground color, pick Color fill; to fill it with an image pattern, select Pattern fill.
Thank you so much for reading the Post. We hope you can remove the background in gimp to follow our article. If you face any issues, feel free to drop a comment and contact us at any time.


