How to Make an Image Clearer in GIMP?

Do you wish to make corrections to your blurry images so they appear clear and professional to your audience using the GIMP photo editor? Continue reading to discover how you could accomplish this task.
Learning how to adjust blurry images is one fundamental skill every photo editor must possess to thrive in the photography industry. Besides giving a more transparent view to your audience and helping them better understand your story, clear images depict professionalism.
To edit a blurry or faded image, software engineers have developed several toolkits to aid the process, and GIMP is one. The GIMP photo editor is an incredible toolkit with rich editing features that you could use to sharpen your images so they look clear.
Although GIMP is a great photo editing toolkit, most users find it difficult to operate. For this reason, we’ve decided to compile the tutorial guide- on how to make an image more straightforward in GIMP.
Table of Contents
Stepwise Guide to Make an Image Clearer in GIMP
Apply the step-by-step guide given below to make an image more straightforward using the GIMP photo editor:
Step 1. Launch the GIMP Photo Editor
From your web browser, visit the official webpage for the GIMP photo editor. Here is a visual representation of what you will find on your screen:
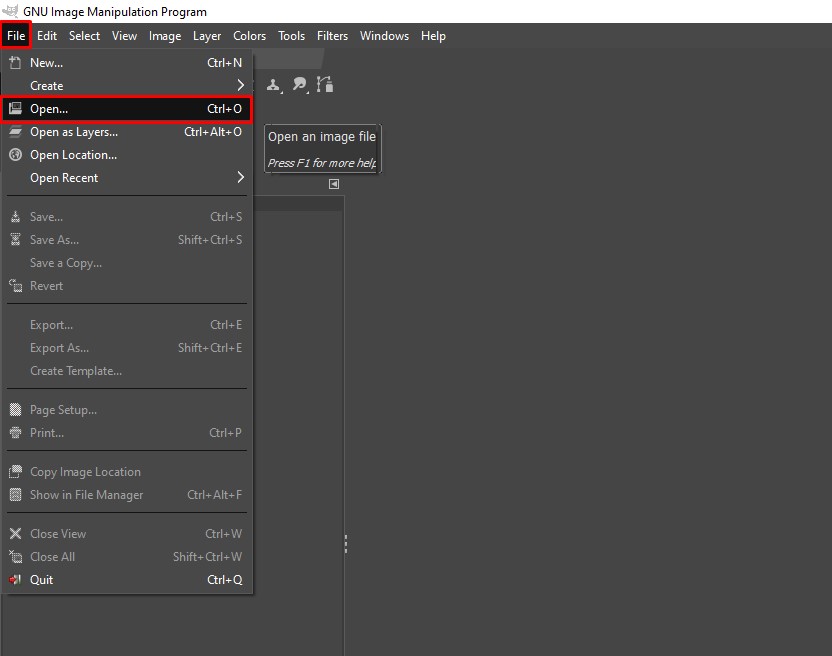
Step 2. Import an Image File
Next, locate and click on the File tab. A drop-down menu will pop up; find the Open tab and click on it. GIMP will automatically direct you to your local drive, where your image files are stored. Please select one of your blurry images, then hit the Open tab to upload it.
Step 3. Duplicate the Image File
With the help of the hotkeys Ctrl + D, duplicate the image you uploaded in the GIMP photo editor. Alternatively, you can right-click on the image interface, select Image from the drop-down menu list, then navigate down and click the Duplicate option.

Note: You can skip this part, but we recommend you apply it so you can compare the edited and original images.
Step 4. Sharpen the Image with Filter
Next, navigate your mouse to the top toolbar and select Filters from the options. A drop-down menu will immediately pop up. Scroll down to Enhance and select the Sharpen effect option.
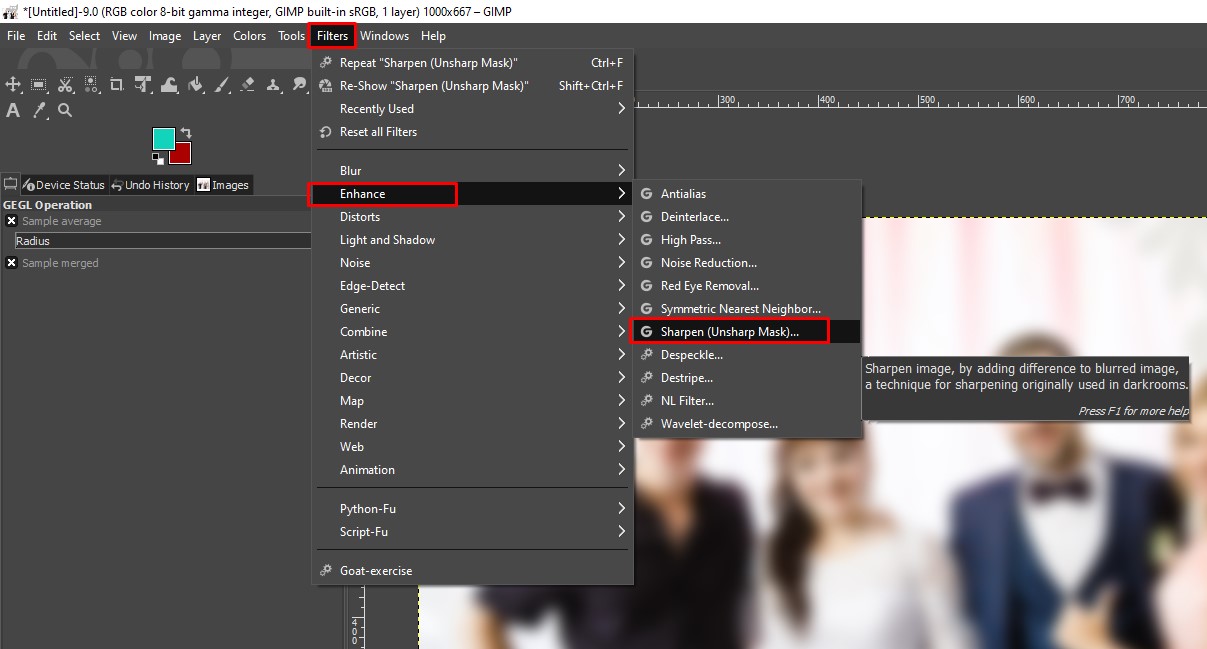
Adjust the sharpening effect to your desire, then hit the OK button. Your blurry image file will automatically change and become transparent.
 Step 4. Save the Image
 Step 4. Save the Image
Now that you’ve successfully adjusted your blurry image file, download and save the edited file to your local drive. To do this, tap the Ctrl + S keys, select where to store the file, and then hit the OK button to complete the process.
FAQ
Here are some extensive knowledge questions and answers to help you understand the topic more:
How Can I Make My Image Clearer?
With the aid of a professional photo editor, you can sharpen your blurry images so they look more precise and more appealing to your audience. There are many toolkits developed for this purpose, and GIMP is one of them.
Can I Improve Image Quality in GIMP?
Yes, you can adjust your image files in GIMP to improve the quality. The process is simple and quick, especially when you know how to use the toolkits. Here is a quick guide you can follow to accomplish this:
- Visit the official website for GIMP photo editor
- Import an image file from your local drive by clicking on File > Open
- Next, go to Image > Print Size
- A dialogue box will immediately pop up on your screen, just as shown below:
Ensure your image’s print size, width, and height are “inches (in).” Should you find another measurement unit there, click on the drop-down menu to switch to “in.”
- Next, change the X and Y resolution values to suit you. Keep in mind that the width and height sizes will also change while you adjust these values.
- Tap on the OK button to complete and validate your changes to the image file.
- Download and save the edited image to your local drive using the hotkeys Ctrl + A. Better yet, you could click on File > Save
Conclusion
Finally, you have the tutorial guide- how to make an image more straightforward in GIMP at your fingertip, apply it in your photo editing projects, and see results. Adjusting a blurry or faded image with GIMP is like a walk in the park with this guide.


