How to Remove Background from Jewelry Images in Photoshop
A functional and reliable background remover typically enables someone to create a faster and more comfortable experience when editing photos in your specific design. As most of us know, Jewelry images’ backgrounds are difficult to remove, but I have a solution for you.
Besides, with today’s technology, we can remove backgrounds from jewelry images, fill different backgrounds easily /quickly, and add shapes. Photoshop comes with different and practical tools that aid photographers in removing the background from any image. However, these tools are designed for specific tasks, making the photographing process easier.
Many photographers have heard of or come across the pen Tool, a widely used and helpful tool in this industry. Without further ado, allow me to create an ultimate guide to fully understand removing the background image from jewelry images, particularly with the pen tool.
Table of Contents
Why is it necessary to remove the background from jewelry images?
There are many reasons why we might want to make an image transparent. In some cases, we might require using the logo in our design, though it has a very white background, which might appear bad when utilizing the design. Secondly, someone might require adding a product image on you, which is his/her specific site without the cluttered background. Alternatively, you may need to merge two images and add a similar background.
How do you remove the jewelry image background using a pen tool?
In this article, we will show you how to professionally remove background from jewelry images without losing quality. So let’s get started!
Step 1: Open the image
We know that opening a Jewelry image when editing in Photoshop is obvious, but it is essential. Besides, there are different ways to open a photo in Photoshop. Manual and automatic are two significant processes for opening the image in Photoshop.
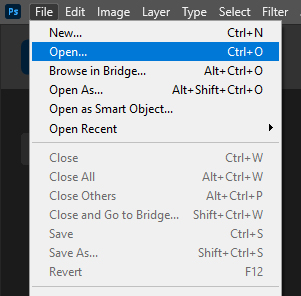
The automatic way is simple: move to Windows, drag your required image right to Photoshop, and automatically open it. On the other hand, the manual way is to open the Photoshop application, move to file, open, choose the image from Windows, and press enter to open. Alternatively, you can use the hotkey “Ctrl+O” for Windows and Command+O for Mac.

Step 2. Select pen tool
Pick your Pen Tool right from the side menu. This specific tool icon is simple to spot; click it and choose or preferably use the shortcut “P” on the keyboard.

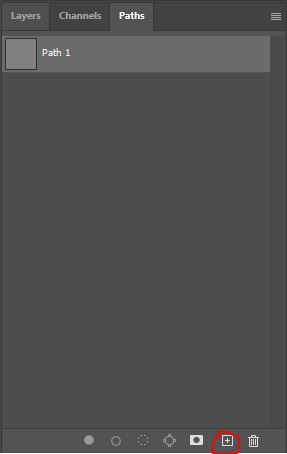
Step 3. Take the path
When removing the background on a jewelry image, someone should draw a perfect clipping path against the image. Besides, Photoshop is known to work on many different layers. Thus, it is suitable to eventually take a path layer to draw your clipping path over a specific image.
To take the path, move to the layer panel, click path, and you will find another box. Now move down, click the Create a new path button from the right next to the delete selection button, and you will come across the path layer. If you can’t find the path panel, then enable it from the window tab.
Step 4. Draw the path
Now that you have chosen the pen tool and taken the path, draw the path around the photo to select it. In this case, you need to zoom in on the image at least 200-300% until you see the edge, add anchor points, and you might wait for some minutes.
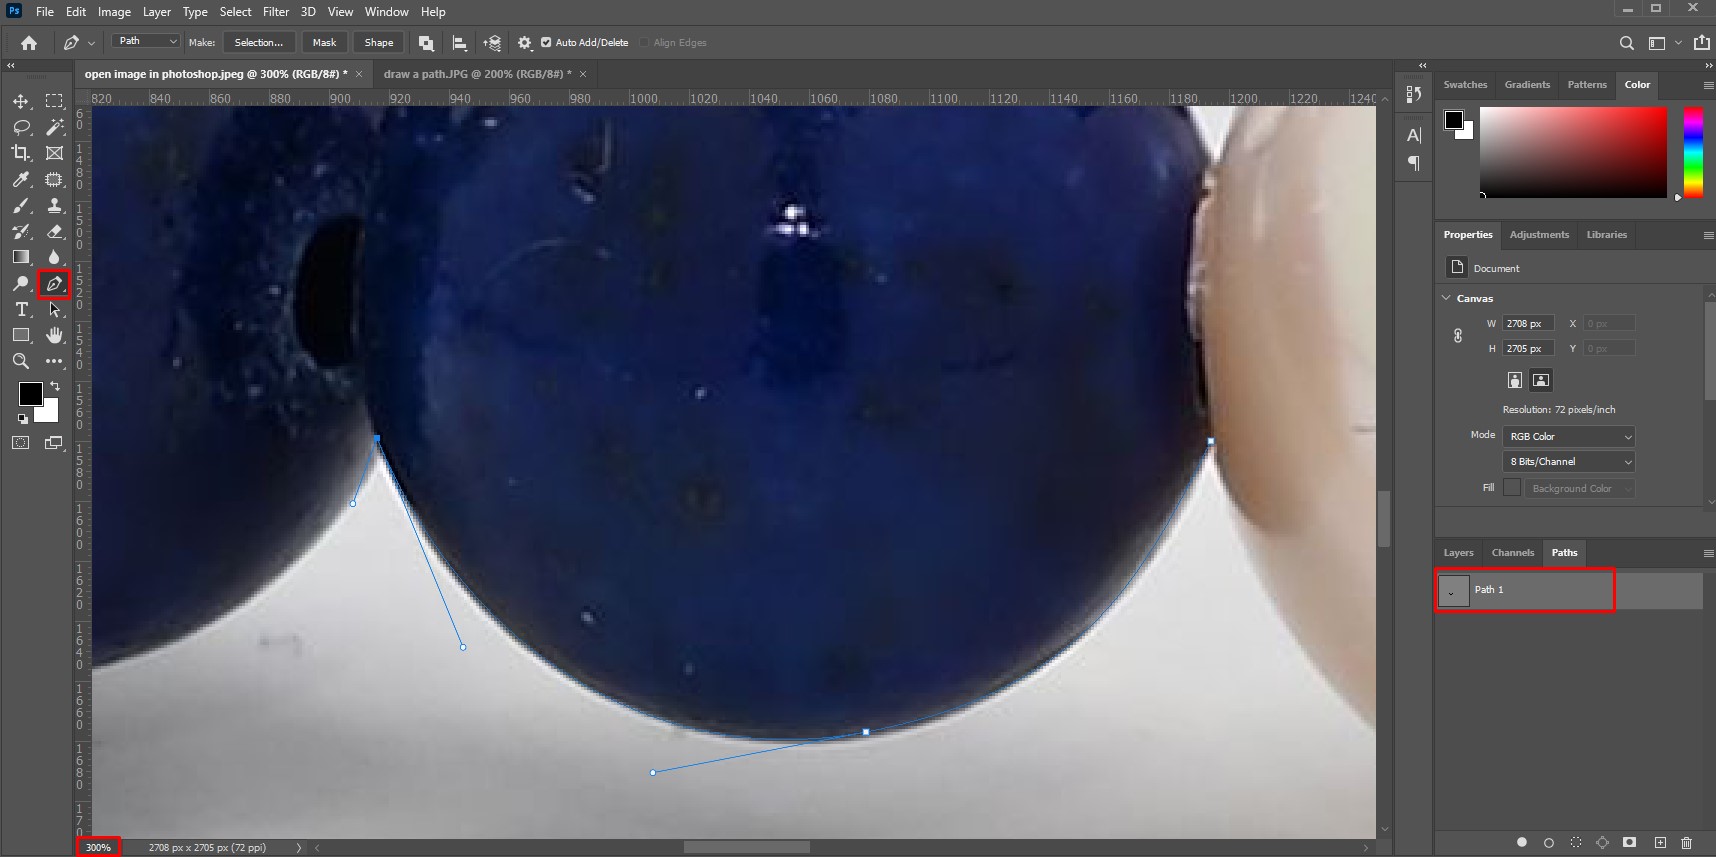
However, for some of us with images that have close boundaries, we might want to add a second path to remove the background right from inside the photo boundary eventually.

Step 5. Convert the selection
Now, turn the path you drew using the pen tool into a specific selection. To do this, right-click on the path on the panel, then click on the selection that indicates “Make selection.”
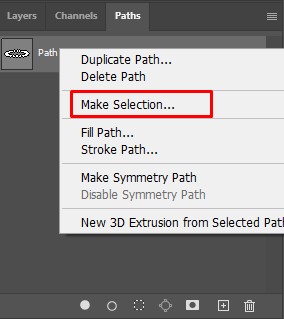
After this, you will see a detailed message box asking you about the value of feathers. A feather means softening of the image sides; thus, you can select an appropriate value like 0.5 or 1 and press enter or click the OK button.

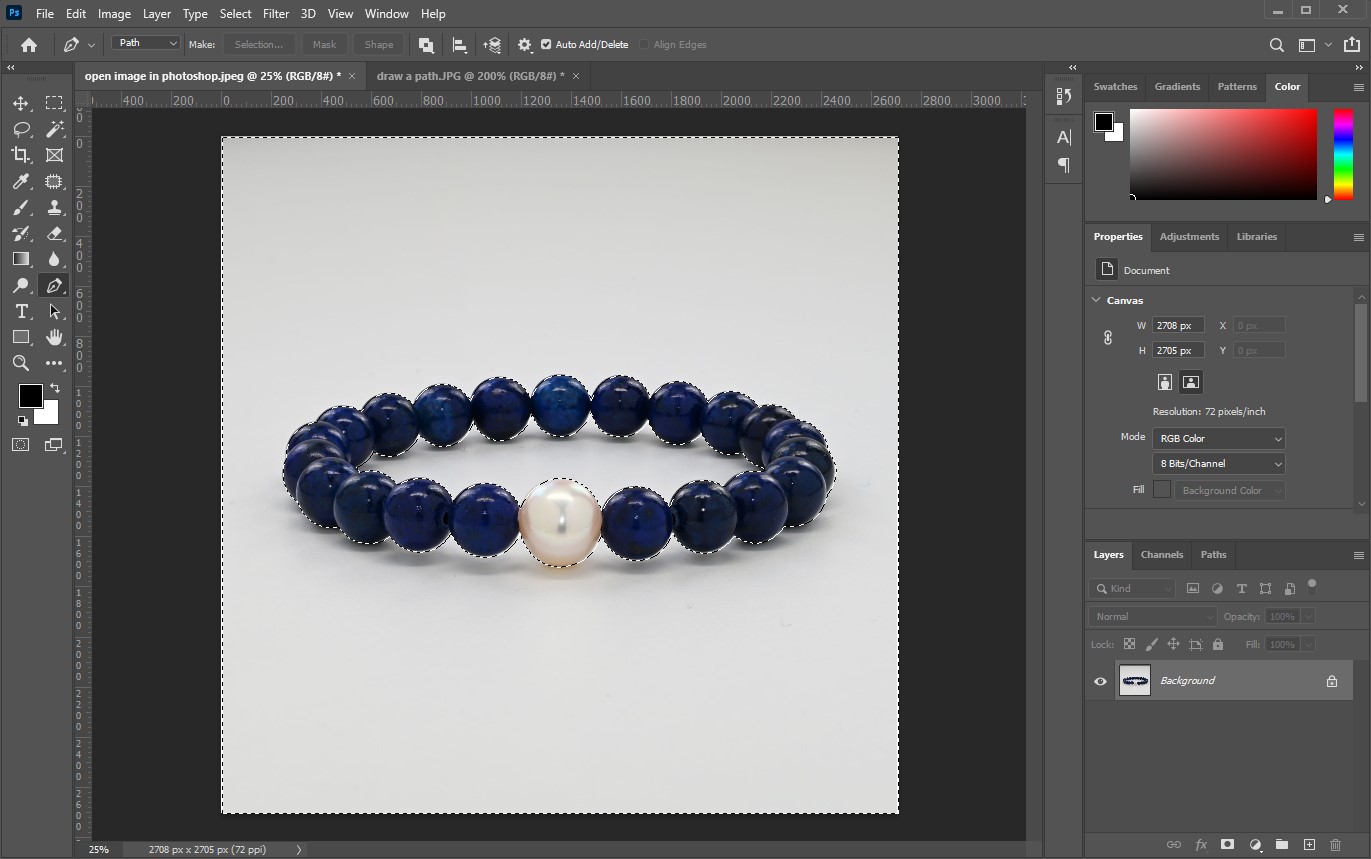
Now, you can see the path selection around the product image.

Step 6. Inverse selection
For the individuals with the outer boundary of the photo, you might need to do this additional step once you have converted the path selection. So, move to the Select menu, then click inverse, and select background, making it simple to remove it. You can also use the shortcut keys “Ctrl+Shift+I” to inverse the selection.
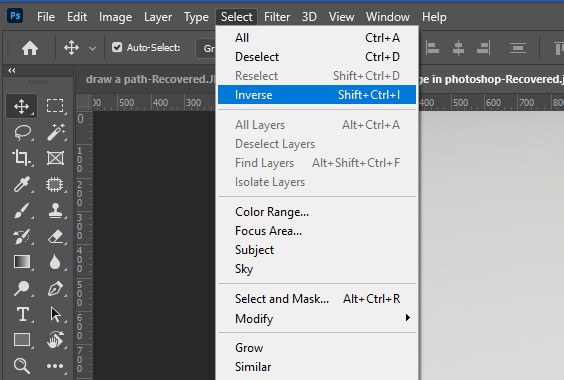
After inversed,
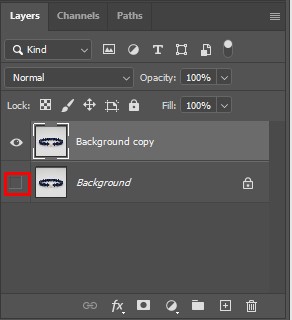
Step 7. Duplicate the background layer
After step six, it is very easy to eventually remove the background. However, you might require duplicating the original background layer. Thus, click right on the background layer and find the selection that indicates Duplicate Layer.
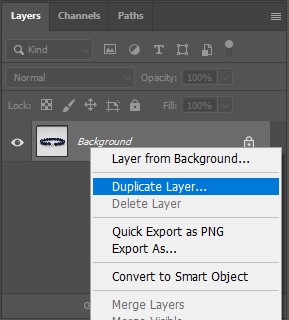
And turn off the perceptibility of the original layer.
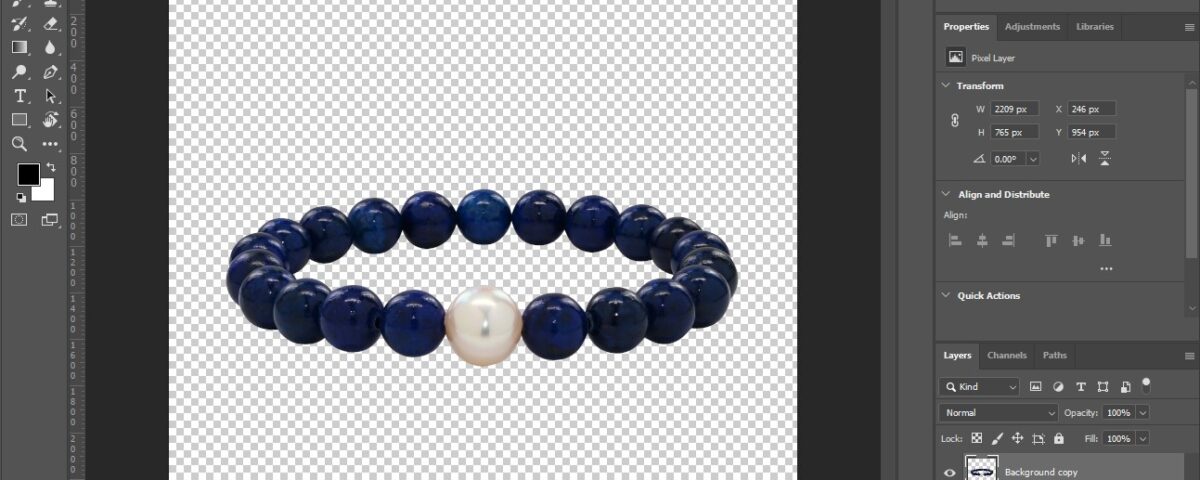
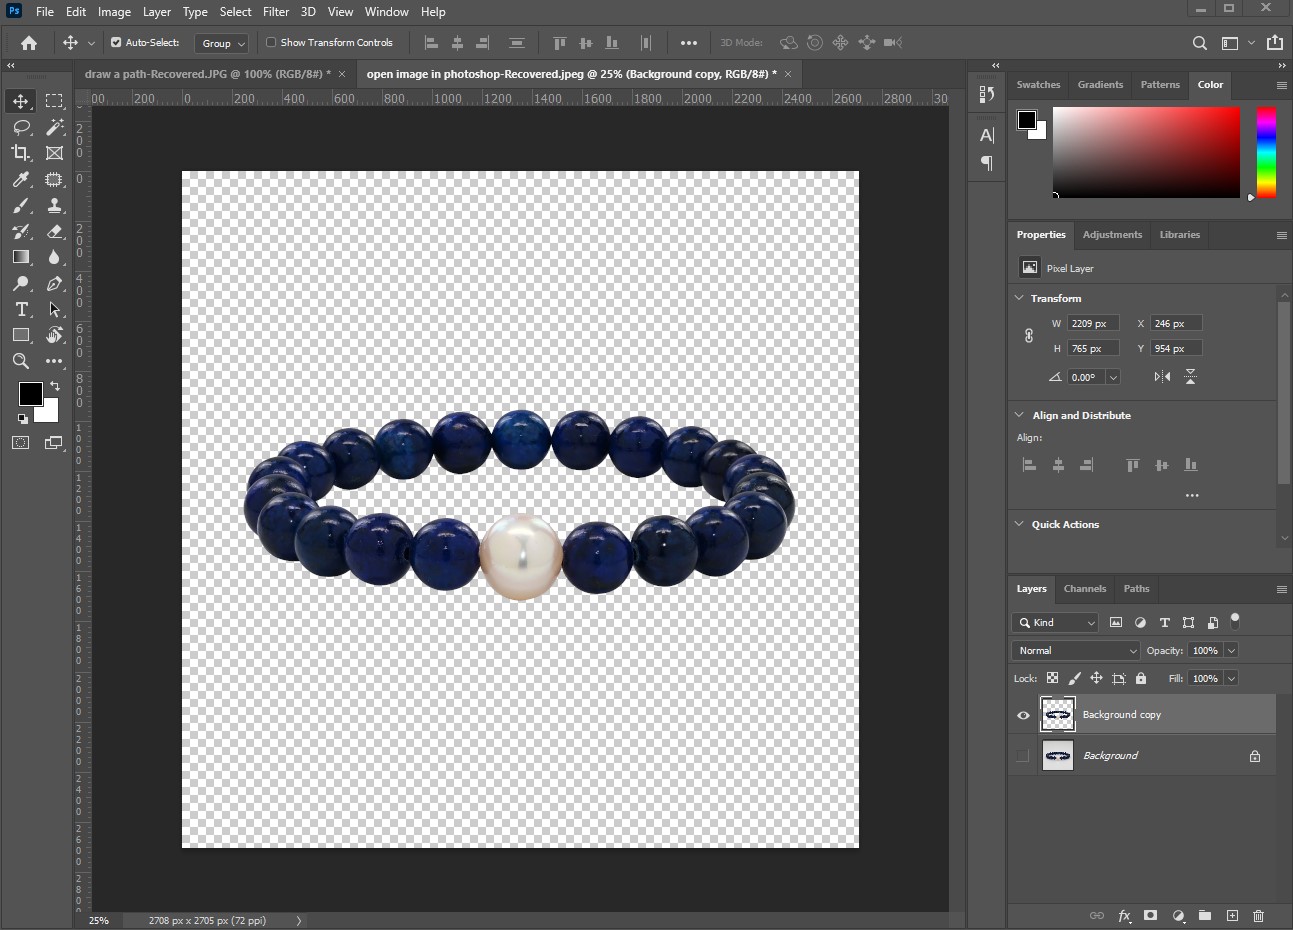
Step 8. Delete the Background
Now select the background copy layer, hit the delete button on the keyboard, and remove the background on the jewelry image. Remember to repeat the same process for multiple paths, move to the inverse selection, and hit the delete button.
9. Save the image
After removing the background, you should save the image on your computer. For saving the jewelry image, click File Save as Select PNG from Save as type) Save.
If you need a transparent background, you should select PNG or JPG format for white or any other color background.
Why is the pen tool a dependable and top-rated for removing image backgrounds?
Some might say that related tools such as Magic wands and Background erasers are fast and easy to utilize. I don’t deny it, but according to the experts, the pen tool is safe, reliable, and top-rated for removing the background.
The fact that we can zoom in and add anchor points to draw close boundaries around the photos makes the pen tool the best option. This allows the user to get all the details in the pictures easily;
(a) The pen tool is essential for sketching tool when creating freehand artwork
(b) Best for converting the raster graphic right to vector graphic via tracing
Conclusion
Using a pen tool requires time and effort to get the perfect grip on your mouse. However, it works magic in offering excellent, clear, and detailed results. Generally, jewelry images are among the most difficult to edit, and remove the background. As a result, the pen tool has made this process quicker and easier for Photographers. Luckily, I have provided a comprehensive guide to help you understand how to use a pen tool to remove the background on jewelry images. Try it today; it is a fantastic tool.
If you don’t have sufficient time to do it yourself, you can hire us as your jewelry photo editing partner. We can edit an image for you as a free trial to judge our quality. Hit the buttons below!


