Product Photography at Home

Product Photography at Home
In today’s world, every business needs a visual expression of its goods and services to generate more leads. You might wonder why this is so. Visual expression gives your customers a clear understanding of what your product entails, thereby convincing them to request a supply.


Whether or not people will ask for your product depends on the quality of the visual presentation—the product photography at home. Don’t understand what product photography means? Let’s take a look at that.
Table of Contents
What is Product Photography?
Product Photography is a visual expression of the goods and services provided by an individual or organization. It’s an essential part of online and offline marketing that employs specific techniques to showcase an organization’s products in an attractive way that entices end-users.
But how could this be done?
Depending on the size of your business, there are several ways by which you can create high-quality product photography. However, this article will focus on how small businesses can invest in professional product photography without breaking the bank. Without wasting your time, keep reading:
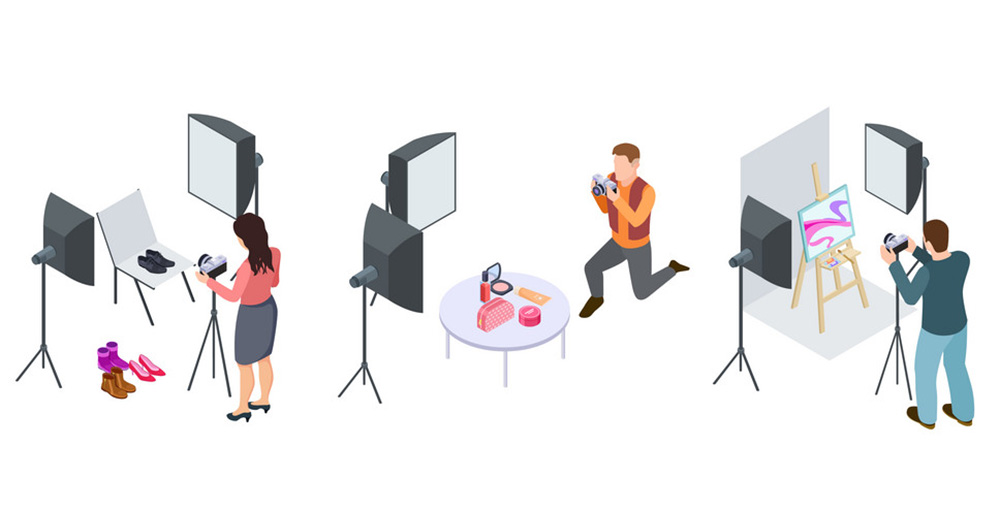
How can I do Product Photography at home?
For small-scale or start-up businesses, DIY product photography is the best way to achieve high-quality visual presentations at home. This is because of its simplicity and affordability. You needn’t be an expert photographer before you can execute DIY product photography. All that’s required of you is having the right toolkit and the basic knowledge of how to use it.
Product Photography Tips for Beginners
To create top-notch product photography, here are some tips to guide you:
Product Photography at Home
1. Use Proper Lightning
Lightning is an essential element that determines the quality of an entire shoot before it starts, and a solid understanding of the basics yields incredible results and simplifies your post-processing. To light up your product photo shoot background, you have to choose between these two lightning types:
- Natural Lightning
- Artificial Lightning
Natural Lightning involves providing light from a natural source, usually sunlight. This lightning type is time-saving, economical, and best suited for small in-house photoshoots. It’s also easy to manipulate. With these merits, you can employ natural lightning in DIY product photography.
2. Use a Tripod
For consistency, stability, and focus, a tripod must be erected during a photoshoot so you can capture sharp images with beautiful compositions. In addition to these merits, tripods can be used to regulate the effect of lights. For instance, when you shoot a photograph in a low-light environment, the image quality is slated to reduce. However, the image quality will increase if you have a tripod in place.
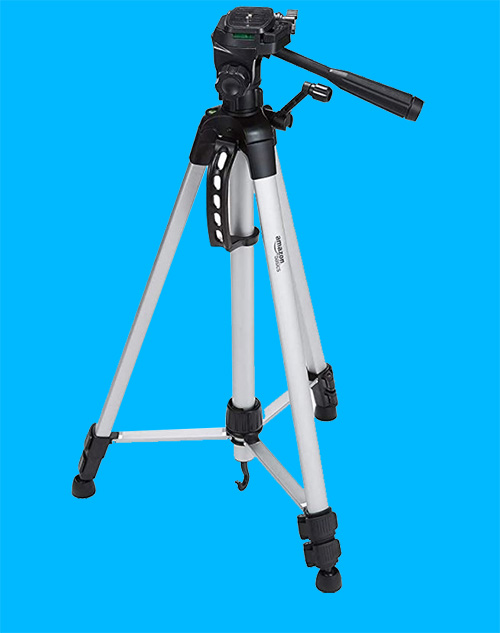
There are thousands of quality tripods out there for product photography. However, you have to consider your budget before deciding on which one to use. You can use the AmazonBasics 60-inch Lightweight Tripod with Bag for DIY photography. The $27.99 tripod is handy and has all the features of a good tripod.
3. Shoot for the Edit
Just so you don’t waste your time trying to shoot an excellent photograph, you must consider shooting for edits. This implies that you don’t need to worry about the image’s appearance when you are taking footage. You can constantly perfect the job by editing the photos at the end of the photoshoot.
4. Take a Basic Photo Editing
To give your product photograph that polished and flawless look, you have to edit them a bit. You need a professional photo editing program to get this job done, and there are many of them available online. However, not all have the features you require as an end-user. Here, we implore you to use them because of the simplicity of the user interface and rich editing features. Also, it’s built with a multi-core processor and GPU accelerator, the two essential components responsible for the high speed of operations.
5. Take Inspiration from Brands you Love
To win the hearts of your customers, consider taking inspiration from expert companies in the industry. By inspiration, we mean strategy. Try to evaluate the strategies of top brands to overcome fierce competition in the business world. People don’t consider this, but it is important to your product photography.
6. Get to Know the Rule of Thirds
Consider the image below to understand what the rules of thirds mean:

The rule of thirds means placing the subject of a photograph directly on the grids so you can draw the viewer’s attention to the composition rather than just glancing at the center where the focal point is located. What we are trying to say, in essence, is that the subject of an image shouldn’t be placed at the center but between those intersecting lines shown in the diagram above. With the rule of thirds, you can emphasize your product when taking its photograph.
7. Use Simple Props
Want to make your product look unique and eye-catching? Then consider propping the scene with objects like matchboxes, tissue papers, dense metal boxes, real Gaffer’s tape, etc. So your image doesn’t fall flat. You can use one or several items to achieve this. However, we implore you to use a single object. This is because of the simplicity it provides to your DIY product photoshoots.
8. Take Multiple Shots from Different Angles
From the nooks and cranes of your room, you can take stunning shots of your products to ensure that end-users have a clear view of the different parts of the product. You must get as many props as possible to set the photography scene, try different backgrounds, and then shoot from different angles.
9. Keep your Background Focus
There is no doubt that the background of an image is among the essential elements that define it. It would be best to keep it simple and plain so your customers don’t get lost in the shot. Instead of using light colors like yellow, pink, and blue, which are also lovely for backgrounds, consider using white. It’s the best option for showcasing your product.
10. Place Photos Above a Reflected Surface
Just like lightning, reflective surfaces significantly impact the quality of your image, as you can use them to create different lighting effects. However, photographing these surfaces can be is never a walk in the park. You need to understand how the law of reflection works to leverage this surface so you can shoot amazing photographs without hassle. And if you don’t, we’ve got you covered. Here are some tricks to help you out:
- Use white backgrounds: Ensure that the walls and surface of your product are white backgrounds to harmonize the color of your product photography.
- Please make use of continuous lightning: Since we are concerned about DIY product photography, a constant light source is beneficial for shooting fantastic images. This is because you can easily manipulate it to fit the reflective surface.
- Employ the services of a diffuser: As the name implies, a diffuser helps you spread light from a continuous source across a surface so the spaces around your product are filled with enough light.
Conclusion
With the photography tips in the article, you can create excellent product photography at Home freely and quickly without hassle. If you think it was very helpful, then feel free to share the article with your friends and colleagues.


1 Comment
I spending an entire week trying to get the best photo for my items and it’s so damn hard. All the photographs come out revolting.
I learned so much about product photography, yet additionally, numerous outlooks, and I am feeling more sure. Much thanks to you such a great amount for your supportive post.